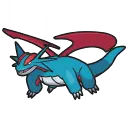
ボーマンダ


種族値
メガシンカ
メガボーマンダ
特性:スカイスキン — ノーマルタイプの技がひこうタイプになり、威力が1.2倍になる。
タイプ相性
| ×4 弱点 | ×2 弱点 | ×½ 耐性 | ×¼ 耐性 | ×0 無効 |
|---|---|---|---|---|
 |
  |
    |
 |
 |
特性
| 順位 | 特性名 | 採用率 ⓘ 効果・推移 |
|---|---|---|
| 1 | いかく | -0.3 登場した時、相手の攻撃を1段階下げる。 採用率の推移 |
| 2 | じしんかじょう | +0.3 攻撃で相手を倒すと攻撃が1段階上がる。 採用率の推移 |
使用率データ
技
| 順位 | 技名 | 採用率 ⓘ 詳細 |
|---|---|---|
| 1 | りゅうのまい |
+7.9 変化PP 20 自分の攻撃、素早さを1段階上げる。 採用率の推移 |
| 2 |  すてみタックル すてみタックル |
+6.6 物理威力 120命中 100%PP 16 与えたダメージの1/3を自分も受ける。 採用率の推移 |
| 3 | じしん |
+7.5 物理威力 100命中 100%PP 12 地中状態の相手には威力が2倍になる。グラスフィールド状態の時、威力が1/2になる。 採用率の推移 |
| 4 | はねやすめ |
+6.3 変化PP 8 自分のHPを最大HPの1/2回復する。ひこうタイプが使うとそのターン中ひこうタイプでなくなる。 採用率の推移 |
| 5 | りゅうせいぐん |
-6.2 特殊威力 130命中 90%PP 8 自分の特攻を2段階下げる。 採用率の推移 |
| 6 | ハイパーボイス |
-6.1 特殊威力 90命中 100%PP 12 通常の攻撃技。 採用率の推移 |
| 7 | だいもんじ |
-6.6 特殊威力 110命中 85%PP 8 10%の確率で相手をやけど状態にする。 採用率の推移 |
| 8 | かえんほうしゃ |
-5.9 特殊威力 90命中 100%PP 16 10%の確率で相手をやけど状態にする。 採用率の推移 |
| 9 | げきりん |
-2.2 物理威力 120命中 100%PP 12 自分はあばれ状態になる。 採用率の推移 |
| 10 | やけっぱち |
物理 威力 75命中 100%PP 12 前のターン自分が動けなかったり技を外したり失敗していた場合、威力が2倍になる。 |
持ち物
| 順位 | 持ち物 | 採用率 ⓘ 詳細 |
|---|---|---|
| 1 |  ボーマンダナイト ボーマンダナイト |
-0.7 対応するポケモンがバトル中にメガシンカできる。 採用率の推移 |
| 2 |  こだわりスカーフ こだわりスカーフ |
+0.1 素早さが1.5倍になるが、同じ技しか出せなくなる。 採用率の推移 |
| 3 | いのちのたま |
攻撃技の威力が1.3倍になるが、攻撃のたびに最大HPの1/10の反動を受ける。 |
| 4 | ゴツゴツメット |
+0.2 接触技を受けると相手に最大HPの1/6のダメージを与える。 採用率の推移 |
| 5 |  ラムのみ ラムのみ |
状態異常・こんらん状態を回復する。1度使うと無くなる。 |
| 6 |  ハバンのみ ハバンのみ |
ドラゴンタイプの効果バツグンの技で受けるダメージを半減する。1度使うと無くなる。 |
| 7 | たつじんのおび |
-0.2 効果バツグンの技の威力が1.2倍になる。 採用率の推移 |
| 8 | しろいハーブ |
能力の低下を1度だけ回復する。1度使うと無くなる。 |
| 9 | ピントレンズ |
急所に当たりやすくなる(急所ランク+1)。 |
| 10 | たべのこし |
ターン終わりに最大HPの1/16回復する。 |
性格
| 順位 | 性格 | 採用率 ⓘ 詳細 |
|---|---|---|
| 1 | いじっぱり (A↑ C↓) | +9.1 採用率の推移 |
| 2 | ようき (S↑ C↓) | -0.3 採用率の推移 |
| 3 | ひかえめ (C↑ A↓) | -2.4 採用率の推移 |
| 4 | おくびょう (S↑ A↓) | -1.3 採用率の推移 |
| 5 | むじゃき (S↑ D↓) | -3.8 採用率の推移 |
| 6 | やんちゃ (C↑ D↓) | +0.6 採用率の推移 |
| 7 | しんちょう (D↑ C↓) | +0.2 採用率の推移 |
| 8 | せっかち | -1.2 採用率の推移 |
| 9 | わんぱく (B↑ C↓) | -1.3 採用率の推移 |
| 10 | おだやか (D↑ A↓) |
ステータス振り
| 順位 | H | A | B | C | D | S | 採用率 ⓘ 詳細 |
|---|---|---|---|---|---|---|---|
| 1 | 1 | 32 | 1 | 0 | 0 | 32 | +2.6 採用率の推移 |
| 2 | 2 | 32 | 0 | 0 | 0 | 32 | +4.5 採用率の推移 |
| 3 | 1 | 0 | 1 | 32 | 0 | 32 | +2.0 採用率の推移 |
| 4 | 2 | 0 | 0 | 32 | 0 | 32 | -0.3 採用率の推移 |
| 5 | 1 | 32 | 0 | 0 | 1 | 32 | -1.5 採用率の推移 |
| 6 | 27 | 25 | 5 | 0 | 0 | 9 | |
| 7 | 0 | 32 | 2 | 0 | 0 | 32 | |
| 8 | 27 | 5 | 1 | 0 | 18 | 15 | |
| 9 | 1 | 0 | 0 | 32 | 1 | 32 | |
| 10 | 21 | 15 | 0 | 0 | 0 | 30 |
H=HP A=こうげき B=ぼうぎょ C=とくこう D=とくぼう S=すばやさ
同じチーム
| 順位 | ポケモン | 平均順位・前回比 ⓘ 推移 |
|---|---|---|
| 1 | 平均 1.0位前回比 0 順位推移(数字が小さいほど多く同居) |
|
| 2 | 平均 2.0位前回比 0 順位推移(数字が小さいほど多く同居) |
|
| 3 | 平均 3.5位前回比 +1 順位推移(数字が小さいほど多く同居) |
|
| 4 | 平均 3.5位前回比 -1 順位推移(数字が小さいほど多く同居) |
|
| 5 | 平均 6.0位前回比 +2 順位推移(数字が小さいほど多く同居) |
|
| 6 | 平均 6.0位前回比 0 順位推移(数字が小さいほど多く同居) |
|
| 7 | 平均 6.0位前回比 -2 順位推移(数字が小さいほど多く同居) |
|
| 8 | 平均 9.0位前回比 +2 順位推移(数字が小さいほど多く同居) |
|
| 9 | 平均 8.5位前回比 -1 順位推移(数字が小さいほど多く同居) |
|
| 10 | 平均 9.5位前回比 -1 順位推移(数字が小さいほど多く同居) |


考察記事
Pokémon Matchups
 ○グソクムシャ
ボーマンダ vs グソクムシャ ボーマンダ's build: ボーマンダナイト, Adamant, H1 A32 B1 S32
Hits-to-KO, Speed, and win/loss for each side's best move against 1 known グソクムシャ build(s).
Assumptions
- Switching, status moves and the opponent's counterattack are not included.
- Moves are treated as always hitting (accuracy is ignored).
- Only guaranteed criticals and guaranteed secondary effects apply (e.g. Draco Meteor's Sp. Atk drop).
- Multi-hit moves use a fixed count: 3 for 2-5 hit moves (the expected value), and the maximum for moves that roll accuracy per hit (Triple Axel, Population Bomb), since hits always land here.
- Counter, Mirror Coat and Metal Burst are excluded: they depend too much on the opponent's move type and power.
- "KO in n" is guaranteed even at the lowest roll; "n hits (p%)" is the chance at higher rolls.
- Factors that actually affected each number (weather, terrain, Intimidate, survival abilities, healing) are shown in the cells.
| Build 1 | |
|---|---|
| ↓ | 81.3〜96.7% Fire Blast 2HKO |
| ↓ | 50.9〜59.6% Iron Head 2HKO |
| Speed | First S172 / S60 |
| Verdict | ○ Win: 2HKO to KO / 2HKO to be KOed, moves first |
 ○Gholdengo
ボーマンダ vs Gholdengo ボーマンダ's build: ボーマンダナイト, Adamant, H1 A32 B1 S32
Hits-to-KO, Speed, and win/loss for each side's best move against 3 known Gholdengo build(s).
Assumptions
- Switching, status moves and the opponent's counterattack are not included.
- Moves are treated as always hitting (accuracy is ignored).
- Only guaranteed criticals and guaranteed secondary effects apply (e.g. Draco Meteor's Sp. Atk drop).
- Multi-hit moves use a fixed count: 3 for 2-5 hit moves (the expected value), and the maximum for moves that roll accuracy per hit (Triple Axel, Population Bomb), since hits always land here.
- Counter, Mirror Coat and Metal Burst are excluded: they depend too much on the opponent's move type and power.
- "KO in n" is guaranteed even at the lowest roll; "n hits (p%)" is the chance at higher rolls.
- Factors that actually affected each number (weather, terrain, Intimidate, survival abilities, healing) are shown in the cells.
| Build 1 | Build 2 | Build 3 | |
|---|---|---|---|
| ↓ | 65.0〜77.3% Lash Out 2HKO | 49.7〜59.1% Lash Out 2 hits (>99%) | 78.5〜93.3% Earthquake 2HKO |
| ↓ | 73.7〜86.5% Make It Rain 2HKO | 55.0〜65.5% Make It Rain 3HKO | 66.7〜78.9% Make It Rain 2HKO |
| Speed | First S172 / S136 | First S172 / S107 | First S172 / S136 |
| Verdict | ○ Win: 2HKO to KO / 2HKO to be KOed, moves first | ○ Win: 2HKO to KO / 3HKO to be KOed, moves first | ○ Win: 2HKO to KO / 2HKO to be KOed, moves first |
 ○Aegislash
ボーマンダ vs Aegislash ボーマンダ's build: ボーマンダナイト, Adamant, H1 A32 B1 S32
Hits-to-KO, Speed, and win/loss for each side's best move against 3 known Aegislash build(s).
Assumptions
- Switching, status moves and the opponent's counterattack are not included.
- Moves are treated as always hitting (accuracy is ignored).
- Only guaranteed criticals and guaranteed secondary effects apply (e.g. Draco Meteor's Sp. Atk drop).
- Multi-hit moves use a fixed count: 3 for 2-5 hit moves (the expected value), and the maximum for moves that roll accuracy per hit (Triple Axel, Population Bomb), since hits always land here.
- Counter, Mirror Coat and Metal Burst are excluded: they depend too much on the opponent's move type and power.
- "KO in n" is guaranteed even at the lowest roll; "n hits (p%)" is the chance at higher rolls.
- Factors that actually affected each number (weather, terrain, Intimidate, survival abilities, healing) are shown in the cells.
| Build 1 | Build 2 | Build 3 | |
|---|---|---|---|
| ↓ | 61.1〜73.1% Earthquake 2HKO | 61.1〜73.1% Earthquake 2HKO | 61.1〜73.1% Earthquake 2HKO |
| ↓ | 54.4〜63.7% Poltergeist 2HKO | 54.4〜63.7% Shadow Ball 2HKO | 64.9〜76.0% Poltergeist 2HKO |
| Speed | First S172 / S80 | First S172 / S72 | First S172 / S80 |
| Verdict | ○ Win: 2HKO to KO / 2HKO to be KOed, moves first | ○ Win: 2HKO to KO / 2HKO to be KOed, moves first | ○ Win: 2HKO to KO / 2HKO to be KOed, moves first |
 ○Mimikyu
ボーマンダ vs Mimikyu ボーマンダ's build: ボーマンダナイト, Adamant, H1 A32 B1 S32
Hits-to-KO, Speed, and win/loss for each side's best move against 3 known Mimikyu build(s).
Assumptions
- Switching, status moves and the opponent's counterattack are not included.
- Moves are treated as always hitting (accuracy is ignored).
- Only guaranteed criticals and guaranteed secondary effects apply (e.g. Draco Meteor's Sp. Atk drop).
- Multi-hit moves use a fixed count: 3 for 2-5 hit moves (the expected value), and the maximum for moves that roll accuracy per hit (Triple Axel, Population Bomb), since hits always land here.
- Counter, Mirror Coat and Metal Burst are excluded: they depend too much on the opponent's move type and power.
- "KO in n" is guaranteed even at the lowest roll; "n hits (p%)" is the chance at higher rolls.
- Factors that actually affected each number (weather, terrain, Intimidate, survival abilities, healing) are shown in the cells.
| Build 1 | Build 2 | Build 3 | |
|---|---|---|---|
| ↓ | 131.3〜156.5% Double-Edge 2HKO (incl. ばけのかわ) | 131.3〜156.5% Double-Edge 2HKO (incl. ばけのかわ) | 131.3〜156.5% Double-Edge 2HKO (incl. ばけのかわ) |
| ↓ | 78.9〜95.3% Play Rough 2HKO | 60.8〜73.7% Play Rough 2HKO | 60.8〜73.7% Play Rough 2HKO |
| Speed | First S172 / S148 | First S172 / S148 | First S172 / S148 |
| Verdict | ○ Win: 2HKO to KO / 2HKO to be KOed, moves first | ○ Win: 2HKO to KO / 2HKO to be KOed, moves first | ○ Win: 2HKO to KO / 2HKO to be KOed, moves first |
 ◎ゴリランダー
ボーマンダ vs ゴリランダー ボーマンダ's build: ボーマンダナイト, Adamant, H1 A32 B1 S32
Hits-to-KO, Speed, and win/loss for each side's best move against 3 known ゴリランダー build(s).
Assumptions
- Switching, status moves and the opponent's counterattack are not included.
- Moves are treated as always hitting (accuracy is ignored).
- Only guaranteed criticals and guaranteed secondary effects apply (e.g. Draco Meteor's Sp. Atk drop).
- Multi-hit moves use a fixed count: 3 for 2-5 hit moves (the expected value), and the maximum for moves that roll accuracy per hit (Triple Axel, Population Bomb), since hits always land here.
- Counter, Mirror Coat and Metal Burst are excluded: they depend too much on the opponent's move type and power.
- "KO in n" is guaranteed even at the lowest roll; "n hits (p%)" is the chance at higher rolls.
- Factors that actually affected each number (weather, terrain, Intimidate, survival abilities, healing) are shown in the cells.
| Build 1 | Build 2 | Build 3 | |
|---|---|---|---|
| ↓ | 153.6〜181.6% Double-Edge 1HKOcalculated with グラスフィールド | 153.6〜181.6% Double-Edge 1HKOcalculated with グラスフィールド | 104.3〜122.7% Double-Edge 1HKOcalculated with グラスフィールド |
| ↓ | 24.0〜28.7% Knock Off 4 hits (94%)calculated with グラスフィールド | 19.3〜22.8% Wood Hammer 999HKOcalculated with グラスフィールド | 18.7〜22.2% Knock Off 999HKOcalculated with グラスフィールド |
| Speed | First S172 / S107 | First S172 / S107 | First S172 / S107 |
| Verdict | ◎ Win: 1HKO to KO / 5HKO to be KOed, moves first | ◎ Win: 1HKO to KO / n/a to be KOed, moves first | ◎ Win: 1HKO to KO / n/a to be KOed, moves first |
 ○Corviknight
ボーマンダ vs Corviknight ボーマンダ's build: ボーマンダナイト, Adamant, H1 A32 B1 S32
Hits-to-KO, Speed, and win/loss for each side's best move against 3 known Corviknight build(s).
Assumptions
- Switching, status moves and the opponent's counterattack are not included.
- Moves are treated as always hitting (accuracy is ignored).
- Only guaranteed criticals and guaranteed secondary effects apply (e.g. Draco Meteor's Sp. Atk drop).
- Multi-hit moves use a fixed count: 3 for 2-5 hit moves (the expected value), and the maximum for moves that roll accuracy per hit (Triple Axel, Population Bomb), since hits always land here.
- Counter, Mirror Coat and Metal Burst are excluded: they depend too much on the opponent's move type and power.
- "KO in n" is guaranteed even at the lowest roll; "n hits (p%)" is the chance at higher rolls.
- Factors that actually affected each number (weather, terrain, Intimidate, survival abilities, healing) are shown in the cells.
| Build 1 | Build 2 | Build 3 | |
|---|---|---|---|
| ↓ | 47.8〜56.6% Fire Blast 2 hits (82%) | 47.8〜56.6% Fire Blast 2 hits (30%) | 47.8〜56.6% Fire Blast 3HKO |
| ↓ | 28.7〜33.9% Brave Bird 3 hits (<1%) | 28.7〜33.9% Brave Bird 3 hits (<1%) | 28.7〜33.9% Brave Bird 3 hits (<1%) |
| Speed | First S172 / S87 | First S172 / S78 | First S172 / S78 |
| Verdict | ○ Win: 3HKO to KO / 4HKO to be KOed, moves first | ○ Win: 3HKO to KO / 4HKO to be KOed, moves first | ○ Win: 3HKO to KO / 4HKO to be KOed, moves first |
 ◎Basculegion-F
ボーマンダ vs Basculegion-F ボーマンダ's build: ボーマンダナイト, Adamant, H1 A32 B1 S32
Hits-to-KO, Speed, and win/loss for each side's best move against 3 known Basculegion-F build(s).
Assumptions
- Switching, status moves and the opponent's counterattack are not included.
- Moves are treated as always hitting (accuracy is ignored).
- Only guaranteed criticals and guaranteed secondary effects apply (e.g. Draco Meteor's Sp. Atk drop).
- Multi-hit moves use a fixed count: 3 for 2-5 hit moves (the expected value), and the maximum for moves that roll accuracy per hit (Triple Axel, Population Bomb), since hits always land here.
- Counter, Mirror Coat and Metal Burst are excluded: they depend too much on the opponent's move type and power.
- "KO in n" is guaranteed even at the lowest roll; "n hits (p%)" is the chance at higher rolls.
- Factors that actually affected each number (weather, terrain, Intimidate, survival abilities, healing) are shown in the cells.
| Build 1 | Build 2 | Build 3 | |
|---|---|---|---|
| ↓ | 104.6〜123.9% Double-Edge 1HKO | 104.6〜123.9% Double-Edge 1HKO | 104.6〜123.9% Double-Edge 1HKO |
| ↓ | 60.8〜72.5% Ice Fang 2HKO | 56.1〜67.8% Ice Fang 2HKO | 78.9〜94.2% Ice Fang 2HKO |
| Speed | Second S172 / S195 | First S172 / S143 | First S172 / S130 |
| Verdict | ◎ Win: 1HKO to KO / 2HKO to be KOed, moves second | ◎ Win: 1HKO to KO / 2HKO to be KOed, moves first | ◎ Win: 1HKO to KO / 2HKO to be KOed, moves first |
 ○Farigiraf
ボーマンダ vs Farigiraf ボーマンダ's build: ボーマンダナイト, Adamant, H1 A32 B1 S32
Hits-to-KO, Speed, and win/loss for each side's best move against 3 known Farigiraf build(s).
Assumptions
- Switching, status moves and the opponent's counterattack are not included.
- Moves are treated as always hitting (accuracy is ignored).
- Only guaranteed criticals and guaranteed secondary effects apply (e.g. Draco Meteor's Sp. Atk drop).
- Multi-hit moves use a fixed count: 3 for 2-5 hit moves (the expected value), and the maximum for moves that roll accuracy per hit (Triple Axel, Population Bomb), since hits always land here.
- Counter, Mirror Coat and Metal Burst are excluded: they depend too much on the opponent's move type and power.
- "KO in n" is guaranteed even at the lowest roll; "n hits (p%)" is the chance at higher rolls.
- Factors that actually affected each number (weather, terrain, Intimidate, survival abilities, healing) are shown in the cells.
| Build 1 | Build 2 | Build 3 | |
|---|---|---|---|
| ↓ | 183.6〜218.9% Earthquake 2HKO (incl. きあいのタスキ) | 109.5〜130.5% Earthquake 2HKO (incl. きあいのタスキ) | 83.0〜98.1% Outrage 2HKO |
| ↓ | 88.9〜105.3% Power Gem 1 hits (25%) | 73.7〜87.7% Power Gem 2HKO | 98.2〜115.8% Power Gem 1 hits (81%) |
| Speed | First S172 / S151 | First S172 / S106 | First S172 / S138 |
| Verdict | ○ Win: 2HKO to KO / 2HKO to be KOed, moves first | ○ Win: 2HKO to KO / 2HKO to be KOed, moves first | ○ Win: 2HKO to KO / 2HKO to be KOed, moves first |
 ◎メガリザードンX
ボーマンダ vs メガリザードンX ボーマンダ's build: ボーマンダナイト, Adamant, H1 A32 B1 S32
Hits-to-KO, Speed, and win/loss for each side's best move against 1 known メガリザードンX build(s).
Assumptions
- Switching, status moves and the opponent's counterattack are not included.
- Moves are treated as always hitting (accuracy is ignored).
- Only guaranteed criticals and guaranteed secondary effects apply (e.g. Draco Meteor's Sp. Atk drop).
- Multi-hit moves use a fixed count: 3 for 2-5 hit moves (the expected value), and the maximum for moves that roll accuracy per hit (Triple Axel, Population Bomb), since hits always land here.
- Counter, Mirror Coat and Metal Burst are excluded: they depend too much on the opponent's move type and power.
- "KO in n" is guaranteed even at the lowest roll; "n hits (p%)" is the chance at higher rolls.
- Factors that actually affected each number (weather, terrain, Intimidate, survival abilities, healing) are shown in the cells.
| Build 1 | |
|---|---|
| ↓ | 113.5〜135.5% Draco Meteor 1HKO |
| ↓ | 124.6〜147.4% Outrage 1HKO |
| Speed | First S172 / S167 |
| Verdict | ◎ Win: 1HKO to KO / 1HKO to be KOed, moves first |
◎メガリザードンY
ボーマンダ vs メガリザードンY ボーマンダ's build: ボーマンダナイト, Adamant, H1 A32 B1 S32
Hits-to-KO, Speed, and win/loss for each side's best move against 1 known メガリザードンY build(s).
Assumptions
- Switching, status moves and the opponent's counterattack are not included.
- Moves are treated as always hitting (accuracy is ignored).
- Only guaranteed criticals and guaranteed secondary effects apply (e.g. Draco Meteor's Sp. Atk drop).
- Multi-hit moves use a fixed count: 3 for 2-5 hit moves (the expected value), and the maximum for moves that roll accuracy per hit (Triple Axel, Population Bomb), since hits always land here.
- Counter, Mirror Coat and Metal Burst are excluded: they depend too much on the opponent's move type and power.
- "KO in n" is guaranteed even at the lowest roll; "n hits (p%)" is the chance at higher rolls.
- Factors that actually affected each number (weather, terrain, Intimidate, survival abilities, healing) are shown in the cells.
| Build 1 | |
|---|---|
| ↓ | 116.1〜136.8% Double-Edge 1HKOcalculated with 晴れ |
| ↓ | 67.8〜80.1% Overheat 2HKOcalculated with 晴れ |
| Speed | First S172 / S152 |
| Verdict | ◎ Win: 1HKO to KO / 2HKO to be KOed, moves first |
 ○*エースバーン
ボーマンダ vs エースバーン ボーマンダ's build: ボーマンダナイト, Adamant, H1 A32 B1 S32
Hits-to-KO, Speed, and win/loss for each side's best move against 3 known エースバーン build(s).
Assumptions
- Switching, status moves and the opponent's counterattack are not included.
- Moves are treated as always hitting (accuracy is ignored).
- Only guaranteed criticals and guaranteed secondary effects apply (e.g. Draco Meteor's Sp. Atk drop).
- Multi-hit moves use a fixed count: 3 for 2-5 hit moves (the expected value), and the maximum for moves that roll accuracy per hit (Triple Axel, Population Bomb), since hits always land here.
- Counter, Mirror Coat and Metal Burst are excluded: they depend too much on the opponent's move type and power.
- "KO in n" is guaranteed even at the lowest roll; "n hits (p%)" is the chance at higher rolls.
- Factors that actually affected each number (weather, terrain, Intimidate, survival abilities, healing) are shown in the cells.
| Build 1 | Build 2 | Build 3 | |
|---|---|---|---|
| ↓ | 117.2〜139.5% Double-Edge 1HKO | 117.2〜139.5% Double-Edge 2HKO (incl. きあいのタスキ) | 117.2〜139.5% Double-Edge 1HKO |
| ↓ | 49.1〜57.9% Gunk Shot 2 hits (96%) | 44.4〜52.6% Gunk Shot 2 hits (19%) | 63.7〜74.9% Gunk Shot 2HKO |
| Speed | Second S172 / S256 | Second S172 / S188 | First S172 / S171 |
| Verdict | ◎ Win: 1HKO to KO / 3HKO to be KOed, moves second | ○ Win: 2HKO to KO / 3HKO to be KOed, moves second | ◎ Win: 1HKO to KO / 2HKO to be KOed, moves first |
 ◎Sneasler
ボーマンダ vs Sneasler ボーマンダ's build: ボーマンダナイト, Adamant, H1 A32 B1 S32
Hits-to-KO, Speed, and win/loss for each side's best move against 3 known Sneasler build(s).
Assumptions
- Switching, status moves and the opponent's counterattack are not included.
- Moves are treated as always hitting (accuracy is ignored).
- Only guaranteed criticals and guaranteed secondary effects apply (e.g. Draco Meteor's Sp. Atk drop).
- Multi-hit moves use a fixed count: 3 for 2-5 hit moves (the expected value), and the maximum for moves that roll accuracy per hit (Triple Axel, Population Bomb), since hits always land here.
- Counter, Mirror Coat and Metal Burst are excluded: they depend too much on the opponent's move type and power.
- "KO in n" is guaranteed even at the lowest roll; "n hits (p%)" is the chance at higher rolls.
- Factors that actually affected each number (weather, terrain, Intimidate, survival abilities, healing) are shown in the cells.
| Build 1 | Build 2 | Build 3 | |
|---|---|---|---|
| ↓ | 279.0〜329.9% Double-Edge 1HKO | 279.0〜329.9% Double-Edge 1HKO | 279.0〜329.9% Double-Edge 1HKO |
| ↓ | 35.1〜42.1% Fatal Claw 3HKO | 35.1〜42.1% Fatal Claw 3HKO | 35.1〜42.1% Fatal Claw 3HKO |
| Speed | Second S172 / S172 | Second S172 / S172 | Second S172 / S172 |
| Verdict | ◎ Win: 1HKO to KO / 3HKO to be KOed, moves second | ◎ Win: 1HKO to KO / 3HKO to be KOed, moves second | ◎ Win: 1HKO to KO / 3HKO to be KOed, moves second |
 ○Rotom-W
ボーマンダ vs Rotom-W ボーマンダ's build: ボーマンダナイト, Adamant, H1 A32 B1 S32
Hits-to-KO, Speed, and win/loss for each side's best move against 3 known Rotom-W build(s).
Assumptions
- Switching, status moves and the opponent's counterattack are not included.
- Moves are treated as always hitting (accuracy is ignored).
- Only guaranteed criticals and guaranteed secondary effects apply (e.g. Draco Meteor's Sp. Atk drop).
- Multi-hit moves use a fixed count: 3 for 2-5 hit moves (the expected value), and the maximum for moves that roll accuracy per hit (Triple Axel, Population Bomb), since hits always land here.
- Counter, Mirror Coat and Metal Burst are excluded: they depend too much on the opponent's move type and power.
- "KO in n" is guaranteed even at the lowest roll; "n hits (p%)" is the chance at higher rolls.
- Factors that actually affected each number (weather, terrain, Intimidate, survival abilities, healing) are shown in the cells.
| Build 1 | Build 2 | Build 3 | |
|---|---|---|---|
| ↓ | 53.5〜63.7% Outrage 2 hits (5%) | 53.5〜63.7% Outrage 2HKO | 90.6〜107.1% Outrage 1 hits (44%) |
| ↓ | 33.9〜40.9% Thunderbolt 3HKO | 33.9〜40.9% Thunderbolt 3HKO | 46.2〜55.0% Thunderbolt 2 hits (63%) |
| Speed | First S172 / S106 | First S172 / S106 | First S172 / S138 |
| Verdict | ○ Win: 3HKO to KO / 3HKO to be KOed, moves first | ○ Win: 2HKO to KO / 3HKO to be KOed, moves first | ○ Win: 2HKO to KO / 3HKO to be KOed, moves first |
 ◎Volcarona
ボーマンダ vs Volcarona ボーマンダ's build: ボーマンダナイト, Adamant, H1 A32 B1 S32
Hits-to-KO, Speed, and win/loss for each side's best move against 3 known Volcarona build(s).
Assumptions
- Switching, status moves and the opponent's counterattack are not included.
- Moves are treated as always hitting (accuracy is ignored).
- Only guaranteed criticals and guaranteed secondary effects apply (e.g. Draco Meteor's Sp. Atk drop).
- Multi-hit moves use a fixed count: 3 for 2-5 hit moves (the expected value), and the maximum for moves that roll accuracy per hit (Triple Axel, Population Bomb), since hits always land here.
- Counter, Mirror Coat and Metal Burst are excluded: they depend too much on the opponent's move type and power.
- "KO in n" is guaranteed even at the lowest roll; "n hits (p%)" is the chance at higher rolls.
- Factors that actually affected each number (weather, terrain, Intimidate, survival abilities, healing) are shown in the cells.
| Build 1 | Build 2 | Build 3 | |
|---|---|---|---|
| ↓ | 143.8〜169.8% Double-Edge 1HKO | 250.9〜299.4% Double-Edge 1HKO | 143.8〜169.8% Double-Edge 1HKO |
| ↓ | 28.1〜33.3% Psychic 3 hits (<1%) | 36.8〜43.9% Psychic 3HKO | 28.1〜33.3% Psychic 3 hits (<1%) |
| Speed | First S172 / S122 | First S172 / S152 | First S172 / S122 |
| Verdict | ◎ Win: 1HKO to KO / 4HKO to be KOed, moves first | ◎ Win: 1HKO to KO / 3HKO to be KOed, moves first | ◎ Win: 1HKO to KO / 4HKO to be KOed, moves first |
 ○*イエッサン(オス)
ボーマンダ vs イエッサン(オス) ボーマンダ's build: ボーマンダナイト, Adamant, H1 A32 B1 S32
Hits-to-KO, Speed, and win/loss for each side's best move against 3 known イエッサン(オス) build(s).
Assumptions
- Switching, status moves and the opponent's counterattack are not included.
- Moves are treated as always hitting (accuracy is ignored).
- Only guaranteed criticals and guaranteed secondary effects apply (e.g. Draco Meteor's Sp. Atk drop).
- Multi-hit moves use a fixed count: 3 for 2-5 hit moves (the expected value), and the maximum for moves that roll accuracy per hit (Triple Axel, Population Bomb), since hits always land here.
- Counter, Mirror Coat and Metal Burst are excluded: they depend too much on the opponent's move type and power.
- "KO in n" is guaranteed even at the lowest roll; "n hits (p%)" is the chance at higher rolls.
- Factors that actually affected each number (weather, terrain, Intimidate, survival abilities, healing) are shown in the cells.
| Build 1 | Build 2 | Build 3 | |
|---|---|---|---|
| ↓ | 170.8〜202.2% Double-Edge 1HKOcalculated with サイコフィールド | 170.8〜202.2% Double-Edge 1HKOcalculated with サイコフィールド | 170.8〜202.2% Double-Edge 2HKO (incl. きあいのタスキ)calculated with サイコフィールド |
| ↓ | 56.1〜66.7% Dazzling Gleam 2HKOcalculated with サイコフィールド | 51.5〜60.8% Dazzling Gleam 2HKOcalculated with サイコフィールド | 56.1〜66.7% Dazzling Gleam 2HKOcalculated with サイコフィールド |
| Speed | Second S172 / S220 | First S172 / S161 | First S172 / S147 |
| Verdict | ◎ Win: 1HKO to KO / 2HKO to be KOed, moves second | ◎ Win: 1HKO to KO / 2HKO to be KOed, moves first | ○ Win: 2HKO to KO / 2HKO to be KOed, moves first |
 ○Skeledirge
ボーマンダ vs Skeledirge ボーマンダ's build: ボーマンダナイト, Adamant, H1 A32 B1 S32
Hits-to-KO, Speed, and win/loss for each side's best move against 3 known Skeledirge build(s).
Assumptions
- Switching, status moves and the opponent's counterattack are not included.
- Moves are treated as always hitting (accuracy is ignored).
- Only guaranteed criticals and guaranteed secondary effects apply (e.g. Draco Meteor's Sp. Atk drop).
- Multi-hit moves use a fixed count: 3 for 2-5 hit moves (the expected value), and the maximum for moves that roll accuracy per hit (Triple Axel, Population Bomb), since hits always land here.
- Counter, Mirror Coat and Metal Burst are excluded: they depend too much on the opponent's move type and power.
- "KO in n" is guaranteed even at the lowest roll; "n hits (p%)" is the chance at higher rolls.
- Factors that actually affected each number (weather, terrain, Intimidate, survival abilities, healing) are shown in the cells.
| Build 1 | Build 2 | Build 3 | |
|---|---|---|---|
| ↓ | 49.8〜59.7% Double-Edge 2 hits (78%) | 49.8〜59.7% Double-Edge 3HKO | 49.8〜59.7% Double-Edge 2 hits (>99%) |
| ↓ | 42.1〜50.3% Disarming Voice 2 hits (<1%) | 42.1〜50.3% Disarming Voice 2 hits (<1%) | 42.1〜50.3% Disarming Voice 2 hits (<1%) |
| Speed | First S172 / S86 | First S172 / S86 | First S172 / S86 |
| Verdict | ○ Win: 3HKO to KO / 3HKO to be KOed, moves first | ○ Win: 3HKO to KO / 3HKO to be KOed, moves first | ○ Win: 3HKO to KO / 3HKO to be KOed, moves first |
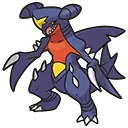 ×Garchomp
ボーマンダ vs Garchomp ボーマンダ's build: ボーマンダナイト, Adamant, H1 A32 B1 S32
Hits-to-KO, Speed, and win/loss for each side's best move against 3 known Garchomp build(s).
Assumptions
- Switching, status moves and the opponent's counterattack are not included.
- Moves are treated as always hitting (accuracy is ignored).
- Only guaranteed criticals and guaranteed secondary effects apply (e.g. Draco Meteor's Sp. Atk drop).
- Multi-hit moves use a fixed count: 3 for 2-5 hit moves (the expected value), and the maximum for moves that roll accuracy per hit (Triple Axel, Population Bomb), since hits always land here.
- Counter, Mirror Coat and Metal Burst are excluded: they depend too much on the opponent's move type and power.
- "KO in n" is guaranteed even at the lowest roll; "n hits (p%)" is the chance at higher rolls.
- Factors that actually affected each number (weather, terrain, Intimidate, survival abilities, healing) are shown in the cells.
| Build 1 | Build 2 | Build 3 | |
|---|---|---|---|
| ↓ | 150.3〜178.4% Outrage 1HKO | 137.3〜163.2% Outrage 1HKO | 137.3〜163.2% Outrage 2HKO (incl. きあいのタスキ) |
| ↓ | 150.9〜178.9% Draco Meteor 1HKO | 105.3〜124.0% Outrage 1HKO | 105.3〜124.0% Outrage 1HKO |
| Speed | Second S172 / S223 | Second S172 / S231 | First S172 / S154 |
| Verdict | × Loss: 1HKO to KO / 1HKO to be KOed, moves second | × Loss: 1HKO to KO / 1HKO to be KOed, moves second | × Loss: 2HKO to KO / 1HKO to be KOed, moves first |
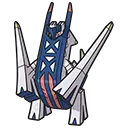 ×Baxcalibur
ボーマンダ vs Baxcalibur ボーマンダ's build: ボーマンダナイト, Adamant, H1 A32 B1 S32
Hits-to-KO, Speed, and win/loss for each side's best move against 3 known Baxcalibur build(s).
Assumptions
- Switching, status moves and the opponent's counterattack are not included.
- Moves are treated as always hitting (accuracy is ignored).
- Only guaranteed criticals and guaranteed secondary effects apply (e.g. Draco Meteor's Sp. Atk drop).
- Multi-hit moves use a fixed count: 3 for 2-5 hit moves (the expected value), and the maximum for moves that roll accuracy per hit (Triple Axel, Population Bomb), since hits always land here.
- Counter, Mirror Coat and Metal Burst are excluded: they depend too much on the opponent's move type and power.
- "KO in n" is guaranteed even at the lowest roll; "n hits (p%)" is the chance at higher rolls.
- Factors that actually affected each number (weather, terrain, Intimidate, survival abilities, healing) are shown in the cells.
| Build 1 | Build 2 | Build 3 | |
|---|---|---|---|
| ↓ | 49.2〜58.4% Outrage 3 hits (1%) (incl. オボンのみ) | 65.9〜77.8% Earthquake 2 hits (19%) | 54.8〜65.0% Earthquake 2 hits (4%) |
| ↓ | 113.5〜134.5% Draco Meteor 1HKO | 138.0〜164.9% Draco Meteor 1HKO | 113.5〜134.5% Draco Meteor 1HKO |
| Speed | First S172 / S105 | First S172 / S150 | First S172 / S105 |
| Verdict | × Loss: 4HKO to KO / 1HKO to be KOed, moves first | × Loss: 2HKO to KO / 1HKO to be KOed, moves first | × Loss: 3HKO to KO / 1HKO to be KOed, moves first |
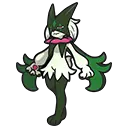 ×Meowscarada
ボーマンダ vs Meowscarada ボーマンダ's build: ボーマンダナイト, Adamant, H1 A32 B1 S32
Hits-to-KO, Speed, and win/loss for each side's best move against 3 known Meowscarada build(s).
Assumptions
- Switching, status moves and the opponent's counterattack are not included.
- Moves are treated as always hitting (accuracy is ignored).
- Only guaranteed criticals and guaranteed secondary effects apply (e.g. Draco Meteor's Sp. Atk drop).
- Multi-hit moves use a fixed count: 3 for 2-5 hit moves (the expected value), and the maximum for moves that roll accuracy per hit (Triple Axel, Population Bomb), since hits always land here.
- Counter, Mirror Coat and Metal Burst are excluded: they depend too much on the opponent's move type and power.
- "KO in n" is guaranteed even at the lowest roll; "n hits (p%)" is the chance at higher rolls.
- Factors that actually affected each number (weather, terrain, Intimidate, survival abilities, healing) are shown in the cells.
| Build 1 | Build 2 | Build 3 | |
|---|---|---|---|
| ↓ | 253.6〜300.7% Double-Edge 1HKO | 253.6〜300.7% Double-Edge 2HKO (incl. きあいのタスキ) | 253.6〜300.7% Double-Edge 1HKO |
| ↓ | 196.5〜233.9% Triple Axel 1HKOcalculated with 最大3ヒット時 | 196.5〜233.9% Triple Axel 1HKOcalculated with 最大3ヒット時 | 255.0〜302.9% Triple Axel 1HKOcalculated with 最大3ヒット時 |
| Speed | Second S172 / S262 | Second S172 / S175 | Second S172 / S175 |
| Verdict | × Loss: 1HKO to KO / 1HKO to be KOed, moves second | × Loss: 2HKO to KO / 1HKO to be KOed, moves second | × Loss: 1HKO to KO / 1HKO to be KOed, moves second |
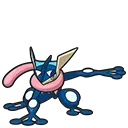 ×Greninja
ボーマンダ vs Greninja ボーマンダ's build: ボーマンダナイト, Adamant, H1 A32 B1 S32
Hits-to-KO, Speed, and win/loss for each side's best move against 3 known Greninja build(s).
Assumptions
- Switching, status moves and the opponent's counterattack are not included.
- Moves are treated as always hitting (accuracy is ignored).
- Only guaranteed criticals and guaranteed secondary effects apply (e.g. Draco Meteor's Sp. Atk drop).
- Multi-hit moves use a fixed count: 3 for 2-5 hit moves (the expected value), and the maximum for moves that roll accuracy per hit (Triple Axel, Population Bomb), since hits always land here.
- Counter, Mirror Coat and Metal Burst are excluded: they depend too much on the opponent's move type and power.
- "KO in n" is guaranteed even at the lowest roll; "n hits (p%)" is the chance at higher rolls.
- Factors that actually affected each number (weather, terrain, Intimidate, survival abilities, healing) are shown in the cells.
| Build 1 | Build 2 | Build 3 | |
|---|---|---|---|
| ↓ | 135.6〜159.7% Double-Edge 2HKO (incl. きあいのタスキ) | 121.5〜143.0% Double-Edge 1HKO | 135.6〜159.7% Double-Edge 1HKO |
| ↓ | 184.8〜219.9% Ice Beam 1HKO | 198.8〜238.6% Ice Beam 1HKO | 184.8〜219.9% Ice Beam 1HKO |
| Speed | Second S172 / S174 | Second S172 / S213 | Second S172 / S261 |
| Verdict | × Loss: 2HKO to KO / 1HKO to be KOed, moves second | × Loss: 1HKO to KO / 1HKO to be KOed, moves second | × Loss: 1HKO to KO / 1HKO to be KOed, moves second |
 ×A-Ninetales
ボーマンダ vs A-Ninetales ボーマンダ's build: ボーマンダナイト, Adamant, H1 A32 B1 S32
Hits-to-KO, Speed, and win/loss for each side's best move against 2 known A-Ninetales build(s).
Assumptions
- Switching, status moves and the opponent's counterattack are not included.
- Moves are treated as always hitting (accuracy is ignored).
- Only guaranteed criticals and guaranteed secondary effects apply (e.g. Draco Meteor's Sp. Atk drop).
- Multi-hit moves use a fixed count: 3 for 2-5 hit moves (the expected value), and the maximum for moves that roll accuracy per hit (Triple Axel, Population Bomb), since hits always land here.
- Counter, Mirror Coat and Metal Burst are excluded: they depend too much on the opponent's move type and power.
- "KO in n" is guaranteed even at the lowest roll; "n hits (p%)" is the chance at higher rolls.
- Factors that actually affected each number (weather, terrain, Intimidate, survival abilities, healing) are shown in the cells.
| Build 1 | Build 2 | |
|---|---|---|
| ↓ | 65.7〜77.7% Double-Edge 2HKOcalculated with あられ | 82.0〜98.0% Double-Edge 2HKOcalculated with あられ |
| ↓ | 135.7〜161.4% Blizzard 1HKOcalculated with あられ | 114.6〜135.7% Freeze-Dry 1HKOcalculated with あられ |
| Speed | Second S172 / S177 | Second S172 / S177 |
| Verdict | × Loss: 2HKO to KO / 1HKO to be KOed, moves second | × Loss: 2HKO to KO / 1HKO to be KOed, moves second |
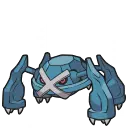 ×Metagross
ボーマンダ vs Metagross ボーマンダ's build: ボーマンダナイト, Adamant, H1 A32 B1 S32
Hits-to-KO, Speed, and win/loss for each side's best move against 1 known Metagross build(s).
Assumptions
- Switching, status moves and the opponent's counterattack are not included.
- Moves are treated as always hitting (accuracy is ignored).
- Only guaranteed criticals and guaranteed secondary effects apply (e.g. Draco Meteor's Sp. Atk drop).
- Multi-hit moves use a fixed count: 3 for 2-5 hit moves (the expected value), and the maximum for moves that roll accuracy per hit (Triple Axel, Population Bomb), since hits always land here.
- Counter, Mirror Coat and Metal Burst are excluded: they depend too much on the opponent's move type and power.
- "KO in n" is guaranteed even at the lowest roll; "n hits (p%)" is the chance at higher rolls.
- Factors that actually affected each number (weather, terrain, Intimidate, survival abilities, healing) are shown in the cells.
| Build 1 | |
|---|---|
| ↓ | 61.1〜72.6% Earthquake 2HKO |
| ↓ | 124.6〜148.5% Ice Punch 1HKO |
| Speed | First S172 / S162 |
| Verdict | × Loss: 2HKO to KO / 1HKO to be KOed, moves first |
 ×Dragonite
ボーマンダ vs Dragonite ボーマンダ's build: ボーマンダナイト, Adamant, H1 A32 B1 S32
Hits-to-KO, Speed, and win/loss for each side's best move against 3 known Dragonite build(s).
Assumptions
- Switching, status moves and the opponent's counterattack are not included.
- Moves are treated as always hitting (accuracy is ignored).
- Only guaranteed criticals and guaranteed secondary effects apply (e.g. Draco Meteor's Sp. Atk drop).
- Multi-hit moves use a fixed count: 3 for 2-5 hit moves (the expected value), and the maximum for moves that roll accuracy per hit (Triple Axel, Population Bomb), since hits always land here.
- Counter, Mirror Coat and Metal Burst are excluded: they depend too much on the opponent's move type and power.
- "KO in n" is guaranteed even at the lowest roll; "n hits (p%)" is the chance at higher rolls.
- Factors that actually affected each number (weather, terrain, Intimidate, survival abilities, healing) are shown in the cells.
| Build 1 | Build 2 | Build 3 | |
|---|---|---|---|
| ↓ | 64.7〜76.0% Outrage 2HKO | 76.0〜89.8% Outrage 2HKO | 76.0〜89.8% Outrage 2HKO |
| ↓ | 168.4〜200.0% Draco Meteor 1HKO | 119.3〜141.5% Draco Meteor 1HKO | 129.8〜154.4% Draco Meteor 1HKO |
| Speed | First S172 / S152 | First S172 / S145 | First S172 / S132 |
| Verdict | × Loss: 2HKO to KO / 1HKO to be KOed, moves first | × Loss: 2HKO to KO / 1HKO to be KOed, moves first | × Loss: 2HKO to KO / 1HKO to be KOed, moves first |
Estimated from precomputed 1v1s against the top 30 Pokémon. Both sides pick their best-hitting move from a pool of their 10 most-used moves (switching and status moves not considered). * = the verdict depends on which build (item/nature/EVs) either side runs.
Judge with your own party → Party Builder