
ミミズズ

種族値
タイプ相性
| ×4 弱点 | ×2 弱点 | ×½ 耐性 | ×0 無効 |
|---|---|---|---|
— |
   |
         |  |
特性
| 順位 | 特性名 | 採用率 ⓘ 効果・推移 |
|---|---|---|
| 1 | どしょく | 0.0 じめんタイプの技が効かず、最大HPの1/4回復する。 採用率の推移 |
使用率データ
技
| 順位 | 技名 | 採用率 ⓘ 詳細 |
|---|---|---|
| 1 | ボディプレス |
-4.4 物理威力 80命中 100%PP 12 この技は攻撃ではなく、防御の数値でダメージが決まる。 採用率の推移 |
| 2 | しっぽきり |
-16.8 変化PP 12 自分のHPを最大HPの1/2減らし、みがわりを出す。その後、手持ちの他のポケモンと交代する。みがわりは自分の代わりに技を受ける。最大HPの1/4分のダメージを受けると消える。 採用率の推移 |
| 3 | ヘビーボンバー |
+21.5 物理命中 100%PP 12 自分が相手より重いほど威力が上がる。相手の重さが自分の重さの1/5以下で120、1/4以下で100、1/3以下で80、1/2以下で60、1/2より上で40。ちいさくなる状態の相手には、威力が2倍になり必ず命中する。 採用率の推移 |
| 4 | てっぺき |
+30.7 変化PP 16 自分の防御を2段階上げる。 採用率の推移 |
| 5 | ステルスロック |
-0.4 変化PP 20 相手の場をステルスロック状態にする。 採用率の推移 |
| 6 | メタルバースト |
-17.4 物理命中 100%PP 12 使ったターンに相手から受けた技のダメージを1.5倍にして返す。 採用率の推移 |
| 7 | がんせきふうじ |
-23.3 物理威力 60命中 95%PP 16 相手の素早さを1段階下げる。 採用率の推移 |
| 8 | じしん |
物理 威力 100命中 100%PP 12 地中状態の相手には威力が2倍になる。グラスフィールド状態の時、威力が1/2になる。 |
| 9 | アイアンヘッド |
-1.3 物理威力 80命中 100%PP 16 20%の確率で相手をひるませる。 採用率の推移 |
| 10 | うちおとす |
物理 威力 50命中 100%PP 16 特性ふゆう・でんじふゆう・ひこうタイプのポケモンにじめんタイプの技が当たるようになる(接地状態)。空中状態の相手にも当たる。 |
持ち物
| 順位 | 持ち物 | 採用率 ⓘ 詳細 |
|---|---|---|
| 1 |  オボンのみ オボンのみ |
-15.0 HPが最大HPの1/2以下になった時、最大HPの1/4回復する。1度使うと無くなる。 採用率の推移 |
| 2 | たべのこし |
+9.6 ターン終わりに最大HPの1/16回復する。 採用率の推移 |
| 3 | メンタルハーブ |
メロメロ・ちょうはつ・連続不可・わざふうじ・かいふくふうじ・アンコール状態を回復する。1度使うと無くなる。 |
| 4 | ゴツゴツメット |
接触技を受けると相手に最大HPの1/6のダメージを与える。 |
| 5 | ひかりのこな |
相手の技の命中率が0.9倍になる。 |
性格
| 順位 | 性格 | 採用率 ⓘ 詳細 |
|---|---|---|
| 1 | わんぱく (B↑ C↓) | +41.8 採用率の推移 |
| 2 | のんき | -11.9 採用率の推移 |
| 3 | しんちょう (D↑ C↓) | -19.1 採用率の推移 |
| 4 | なまいき (D↑ S↓) | -1.0 採用率の推移 |
| 5 | ずぶとい (B↑ A↓) | -11.4 採用率の推移 |
| 6 | いじっぱり (A↑ C↓) | |
| 7 | おだやか (D↑ A↓) |
ステータス振り
| 順位 | H | A | B | C | D | S | 採用率 ⓘ 詳細 |
|---|---|---|---|---|---|---|---|
| 1 | 32 | 0 | 25 | 0 | 0 | 9 | +14.3 採用率の推移 |
| 2 | 32 | 0 | 32 | 0 | 0 | 2 | |
| 3 | 32 | 0 | 2 | 0 | 32 | 0 | -19.3 採用率の推移 |
| 4 | 32 | 0 | 32 | 0 | 2 | 0 | +1.0 採用率の推移 |
| 5 | 31 | 0 | 25 | 0 | 10 | 0 | |
| 6 | 32 | 0 | 25 | 0 | 9 | 0 | |
| 7 | 31 | 0 | 32 | 0 | 3 | 0 | -22.8 採用率の推移 |
| 8 | 32 | 0 | 5 | 0 | 29 | 0 | +2.6 採用率の推移 |
| 9 | 31 | 0 | 31 | 0 | 0 | 4 | |
| 10 | 32 | 2 | 0 | 0 | 32 | 0 |
H=HP A=こうげき B=ぼうぎょ C=とくこう D=とくぼう S=すばやさ
同じチーム
| 順位 | ポケモン | 平均順位・前回比 ⓘ 推移 |
|---|---|---|
| 1 | 平均 1.0位 順位推移(数字が小さいほど多く同居) |
|
| 2 | 平均 2.0位 順位推移(数字が小さいほど多く同居) |
|
| 3 | 平均 2.5位前回比 -1 順位推移(数字が小さいほど多く同居) |
|
| 4 | 平均 4.0位 順位推移(数字が小さいほど多く同居) |
|
| 5 | 平均 5.0位 順位推移(数字が小さいほど多く同居) |
|
| 6 | 平均 6.0位 順位推移(数字が小さいほど多く同居) |
|
| 7 | 平均 6.5位前回比 -1 順位推移(数字が小さいほど多く同居) |
|
| 8 | 平均 8.0位 順位推移(数字が小さいほど多く同居) |
|
| 9 | 平均 9.0位前回比 0 順位推移(数字が小さいほど多く同居) |
|
| 10 | 平均 10.0位前回比 0 順位推移(数字が小さいほど多く同居) |


Pokémon Matchups
 ◎*Hippowdon
Orthworm vs Hippowdon Orthworm's build: Sitrus Berry, Relaxed, H32 B25 S9
Hits-to-KO, Speed, and win/loss for each side's best move against 3 known Hippowdon build(s).
Assumptions
- Switching, status moves and the opponent's counterattack are not included.
- Moves are treated as always hitting (accuracy is ignored).
- Only guaranteed criticals and guaranteed secondary effects apply (e.g. Draco Meteor's Sp. Atk drop).
- Multi-hit moves use a fixed count: 3 for 2-5 hit moves (the expected value), and the maximum for moves that roll accuracy per hit (Triple Axel, Population Bomb), since hits always land here.
- Counter, Mirror Coat and Metal Burst are excluded: they depend too much on the opponent's move type and power.
- "KO in n" is guaranteed even at the lowest roll; "n hits (p%)" is the chance at higher rolls.
- Factors that actually affected each number (weather, terrain, Intimidate, survival abilities, healing) are shown in the cells.
| Build 1 | Build 2 | Build 3 | |
|---|---|---|---|
| ↓ | 20.9〜25.1% Body Press 999HKOcalculated with すなあらし | 19.1〜22.8% Body Press 999HKOcalculated with すなあらし | 20.9〜25.1% Body Press 4 hits (<1%)calculated with すなあらし |
| ↓ | 4.5〜5.6% Ice Fang 999HKOcalculated with すなあらし | 4.5〜5.6% Ice Fang 999HKOcalculated with すなあらし | 4.5〜5.6% Ice Fang 999HKOcalculated with すなあらし |
| Speed | First S84 / S67 | First S84 / S67 | First S84 / S67 |
| Verdict | ○ Win: n/a to KO / n/a to be KOed, moves first | ○ Win: n/a to KO / n/a to be KOed, moves first | ◎ Win: 5HKO to KO / n/a to be KOed, moves first |
Orthworm's build: Leftovers, Impish, H32 B25 S9
Hits-to-KO, Speed, and win/loss for each side's best move against 3 known Hippowdon build(s).
Assumptions
- Switching, status moves and the opponent's counterattack are not included.
- Moves are treated as always hitting (accuracy is ignored).
- Only guaranteed criticals and guaranteed secondary effects apply (e.g. Draco Meteor's Sp. Atk drop).
- Multi-hit moves use a fixed count: 3 for 2-5 hit moves (the expected value), and the maximum for moves that roll accuracy per hit (Triple Axel, Population Bomb), since hits always land here.
- Counter, Mirror Coat and Metal Burst are excluded: they depend too much on the opponent's move type and power.
- "KO in n" is guaranteed even at the lowest roll; "n hits (p%)" is the chance at higher rolls.
- Factors that actually affected each number (weather, terrain, Intimidate, survival abilities, healing) are shown in the cells.
| Build 1 | Build 2 | Build 3 | |
|---|---|---|---|
| ↓ | 20.9〜25.1% Body Press 999HKOcalculated with すなあらし | 19.1〜22.8% Body Press 999HKOcalculated with すなあらし | 20.9〜25.1% Body Press 4 hits (<1%)calculated with すなあらし |
| ↓ | Earthquake n/acalculated with すなあらし | Earthquake n/acalculated with すなあらし | Earthquake n/acalculated with すなあらし |
| Speed | First S94 / S67 | First S94 / S67 | First S94 / S67 |
| Verdict | ○ Win: n/a to KO / n/a to be KOed, moves first | ○ Win: n/a to KO / n/a to be KOed, moves first | ◎ Win: 5HKO to KO / n/a to be KOed, moves first |
Orthworm's build: Mental Herb, Impish, H32 B25 S9
Hits-to-KO, Speed, and win/loss for each side's best move against 3 known Hippowdon build(s).
Assumptions
- Switching, status moves and the opponent's counterattack are not included.
- Moves are treated as always hitting (accuracy is ignored).
- Only guaranteed criticals and guaranteed secondary effects apply (e.g. Draco Meteor's Sp. Atk drop).
- Multi-hit moves use a fixed count: 3 for 2-5 hit moves (the expected value), and the maximum for moves that roll accuracy per hit (Triple Axel, Population Bomb), since hits always land here.
- Counter, Mirror Coat and Metal Burst are excluded: they depend too much on the opponent's move type and power.
- "KO in n" is guaranteed even at the lowest roll; "n hits (p%)" is the chance at higher rolls.
- Factors that actually affected each number (weather, terrain, Intimidate, survival abilities, healing) are shown in the cells.
| Build 1 | Build 2 | Build 3 | |
|---|---|---|---|
| ↓ | 20.9〜25.1% Body Press 999HKOcalculated with すなあらし | 19.1〜22.8% Body Press 999HKOcalculated with すなあらし | 20.9〜25.1% Body Press 4 hits (<1%)calculated with すなあらし |
| ↓ | 4.5〜5.6% Ice Fang 999HKOcalculated with すなあらし | 4.5〜5.6% Ice Fang 999HKOcalculated with すなあらし | 4.5〜5.6% Ice Fang 999HKOcalculated with すなあらし |
| Speed | First S94 / S67 | First S94 / S67 | First S94 / S67 |
| Verdict | ○ Win: n/a to KO / n/a to be KOed, moves first | ○ Win: n/a to KO / n/a to be KOed, moves first | ◎ Win: 5HKO to KO / n/a to be KOed, moves first |
 ◎セグレイブ
Orthworm vs セグレイブ Orthworm's build: Sitrus Berry, Relaxed, H32 B25 S9
Hits-to-KO, Speed, and win/loss for each side's best move against 3 known セグレイブ build(s).
Assumptions
- Switching, status moves and the opponent's counterattack are not included.
- Moves are treated as always hitting (accuracy is ignored).
- Only guaranteed criticals and guaranteed secondary effects apply (e.g. Draco Meteor's Sp. Atk drop).
- Multi-hit moves use a fixed count: 3 for 2-5 hit moves (the expected value), and the maximum for moves that roll accuracy per hit (Triple Axel, Population Bomb), since hits always land here.
- Counter, Mirror Coat and Metal Burst are excluded: they depend too much on the opponent's move type and power.
- "KO in n" is guaranteed even at the lowest roll; "n hits (p%)" is the chance at higher rolls.
- Factors that actually affected each number (weather, terrain, Intimidate, survival abilities, healing) are shown in the cells.
| Build 1 | Build 2 | Build 3 | |
|---|---|---|---|
| ↓ | 48.2〜57.6% Body Press 2 hits (91%) | 58.6〜70.2% Body Press 2HKO | 58.6〜70.2% Body Press 2HKO |
| ↓ | 22.6〜27.1% きょけんとつげき 999HKO | 18.1〜21.5% きょけんとつげき 999HKO | 25.4〜30.5% きょけんとつげき 5HKO (incl. オボンのみ) |
| Speed | Second S84 / S139 | Second S84 / S152 | Second S84 / S139 |
| Verdict | ◎ Win: 3HKO to KO / n/a to be KOed, moves second | ◎ Win: 2HKO to KO / n/a to be KOed, moves second | ◎ Win: 2HKO to KO / 5HKO to be KOed, moves second |
Orthworm's build: Leftovers, Impish, H32 B25 S9
Hits-to-KO, Speed, and win/loss for each side's best move against 3 known セグレイブ build(s).
Assumptions
- Switching, status moves and the opponent's counterattack are not included.
- Moves are treated as always hitting (accuracy is ignored).
- Only guaranteed criticals and guaranteed secondary effects apply (e.g. Draco Meteor's Sp. Atk drop).
- Multi-hit moves use a fixed count: 3 for 2-5 hit moves (the expected value), and the maximum for moves that roll accuracy per hit (Triple Axel, Population Bomb), since hits always land here.
- Counter, Mirror Coat and Metal Burst are excluded: they depend too much on the opponent's move type and power.
- "KO in n" is guaranteed even at the lowest roll; "n hits (p%)" is the chance at higher rolls.
- Factors that actually affected each number (weather, terrain, Intimidate, survival abilities, healing) are shown in the cells.
| Build 1 | Build 2 | Build 3 | |
|---|---|---|---|
| ↓ | 48.2〜57.6% Body Press 2 hits (91%) | 58.6〜70.2% Body Press 2HKO | 58.6〜70.2% Body Press 2HKO |
| ↓ | 22.6〜27.1% きょけんとつげき 999HKO | 18.1〜21.5% きょけんとつげき 999HKO | 25.4〜30.5% きょけんとつげき 4 hits (<1%) |
| Speed | Second S94 / S139 | Second S94 / S152 | Second S94 / S139 |
| Verdict | ◎ Win: 3HKO to KO / n/a to be KOed, moves second | ◎ Win: 2HKO to KO / n/a to be KOed, moves second | ◎ Win: 2HKO to KO / 5HKO to be KOed, moves second |
Orthworm's build: Mental Herb, Impish, H32 B25 S9
Hits-to-KO, Speed, and win/loss for each side's best move against 3 known セグレイブ build(s).
Assumptions
- Switching, status moves and the opponent's counterattack are not included.
- Moves are treated as always hitting (accuracy is ignored).
- Only guaranteed criticals and guaranteed secondary effects apply (e.g. Draco Meteor's Sp. Atk drop).
- Multi-hit moves use a fixed count: 3 for 2-5 hit moves (the expected value), and the maximum for moves that roll accuracy per hit (Triple Axel, Population Bomb), since hits always land here.
- Counter, Mirror Coat and Metal Burst are excluded: they depend too much on the opponent's move type and power.
- "KO in n" is guaranteed even at the lowest roll; "n hits (p%)" is the chance at higher rolls.
- Factors that actually affected each number (weather, terrain, Intimidate, survival abilities, healing) are shown in the cells.
| Build 1 | Build 2 | Build 3 | |
|---|---|---|---|
| ↓ | 48.2〜57.6% Body Press 2 hits (91%) | 58.6〜70.2% Body Press 2HKO | 58.6〜70.2% Body Press 2HKO |
| ↓ | 22.6〜27.1% きょけんとつげき 4 hits (37%) | 18.1〜21.5% きょけんとつげき 999HKO | 25.4〜30.5% きょけんとつげき 4HKO |
| Speed | Second S94 / S139 | Second S94 / S152 | Second S94 / S139 |
| Verdict | ◎ Win: 3HKO to KO / 5HKO to be KOed, moves second | ◎ Win: 2HKO to KO / n/a to be KOed, moves second | ◎ Win: 2HKO to KO / 4HKO to be KOed, moves second |
 ◎*Mimikyu
Orthworm vs Mimikyu Orthworm's build: Sitrus Berry, Relaxed, H32 B25 S9
Hits-to-KO, Speed, and win/loss for each side's best move against 3 known Mimikyu build(s).
Assumptions
- Switching, status moves and the opponent's counterattack are not included.
- Moves are treated as always hitting (accuracy is ignored).
- Only guaranteed criticals and guaranteed secondary effects apply (e.g. Draco Meteor's Sp. Atk drop).
- Multi-hit moves use a fixed count: 3 for 2-5 hit moves (the expected value), and the maximum for moves that roll accuracy per hit (Triple Axel, Population Bomb), since hits always land here.
- Counter, Mirror Coat and Metal Burst are excluded: they depend too much on the opponent's move type and power.
- "KO in n" is guaranteed even at the lowest roll; "n hits (p%)" is the chance at higher rolls.
- Factors that actually affected each number (weather, terrain, Intimidate, survival abilities, healing) are shown in the cells.
| Build 1 | Build 2 | Build 3 | |
|---|---|---|---|
| ↓ | 73.3〜87.0% Iron Head 3HKO (incl. ばけのかわ) | 73.3〜87.0% Iron Head 3HKO (incl. ばけのかわ) | 73.3〜87.0% Iron Head 3HKO (incl. ばけのかわ) |
| ↓ | 32.2〜37.9% Drain Punch 4HKO | 24.9〜29.4% Drain Punch 999HKO | 24.9〜29.4% Drain Punch 999HKO |
| Speed | Second S84 / S148 | Second S84 / S148 | Second S84 / S148 |
| Verdict | ○ Win: 3HKO to KO / 4HKO to be KOed, moves second | ◎ Win: 3HKO to KO / n/a to be KOed, moves second | ◎ Win: 3HKO to KO / n/a to be KOed, moves second |
Orthworm's build: Leftovers, Impish, H32 B25 S9
Hits-to-KO, Speed, and win/loss for each side's best move against 3 known Mimikyu build(s).
Assumptions
- Switching, status moves and the opponent's counterattack are not included.
- Moves are treated as always hitting (accuracy is ignored).
- Only guaranteed criticals and guaranteed secondary effects apply (e.g. Draco Meteor's Sp. Atk drop).
- Multi-hit moves use a fixed count: 3 for 2-5 hit moves (the expected value), and the maximum for moves that roll accuracy per hit (Triple Axel, Population Bomb), since hits always land here.
- Counter, Mirror Coat and Metal Burst are excluded: they depend too much on the opponent's move type and power.
- "KO in n" is guaranteed even at the lowest roll; "n hits (p%)" is the chance at higher rolls.
- Factors that actually affected each number (weather, terrain, Intimidate, survival abilities, healing) are shown in the cells.
| Build 1 | Build 2 | Build 3 | |
|---|---|---|---|
| ↓ | 73.3〜87.0% Iron Head 3HKO (incl. ばけのかわ) | 73.3〜87.0% Iron Head 3HKO (incl. ばけのかわ) | 73.3〜87.0% Iron Head 3HKO (incl. ばけのかわ) |
| ↓ | 32.2〜37.9% Drain Punch 3 hits (<1%) | 24.9〜29.4% Drain Punch 999HKO | 24.9〜29.4% Drain Punch 999HKO |
| Speed | Second S94 / S148 | Second S94 / S148 | Second S94 / S148 |
| Verdict | ○ Win: 3HKO to KO / 4HKO to be KOed, moves second | ◎ Win: 3HKO to KO / n/a to be KOed, moves second | ◎ Win: 3HKO to KO / n/a to be KOed, moves second |
Orthworm's build: Mental Herb, Impish, H32 B25 S9
Hits-to-KO, Speed, and win/loss for each side's best move against 3 known Mimikyu build(s).
Assumptions
- Switching, status moves and the opponent's counterattack are not included.
- Moves are treated as always hitting (accuracy is ignored).
- Only guaranteed criticals and guaranteed secondary effects apply (e.g. Draco Meteor's Sp. Atk drop).
- Multi-hit moves use a fixed count: 3 for 2-5 hit moves (the expected value), and the maximum for moves that roll accuracy per hit (Triple Axel, Population Bomb), since hits always land here.
- Counter, Mirror Coat and Metal Burst are excluded: they depend too much on the opponent's move type and power.
- "KO in n" is guaranteed even at the lowest roll; "n hits (p%)" is the chance at higher rolls.
- Factors that actually affected each number (weather, terrain, Intimidate, survival abilities, healing) are shown in the cells.
| Build 1 | Build 2 | Build 3 | |
|---|---|---|---|
| ↓ | 73.3〜87.0% Iron Head 3HKO (incl. ばけのかわ) | 73.3〜87.0% Iron Head 3HKO (incl. ばけのかわ) | 73.3〜87.0% Iron Head 3HKO (incl. ばけのかわ) |
| ↓ | 32.2〜37.9% Drain Punch 3 hits (84%) | 24.9〜29.4% Drain Punch 4 hits (>99%) | 24.9〜29.4% Drain Punch 4 hits (>99%) |
| Speed | Second S94 / S148 | Second S94 / S148 | Second S94 / S148 |
| Verdict | ○ Win: 3HKO to KO / 4HKO to be KOed, moves second | ◎ Win: 3HKO to KO / 5HKO to be KOed, moves second | ◎ Win: 3HKO to KO / 5HKO to be KOed, moves second |
 ◎Meowscarada
Orthworm vs Meowscarada Orthworm's build: Sitrus Berry, Relaxed, H32 B25 S9
Hits-to-KO, Speed, and win/loss for each side's best move against 3 known Meowscarada build(s).
Assumptions
- Switching, status moves and the opponent's counterattack are not included.
- Moves are treated as always hitting (accuracy is ignored).
- Only guaranteed criticals and guaranteed secondary effects apply (e.g. Draco Meteor's Sp. Atk drop).
- Multi-hit moves use a fixed count: 3 for 2-5 hit moves (the expected value), and the maximum for moves that roll accuracy per hit (Triple Axel, Population Bomb), since hits always land here.
- Counter, Mirror Coat and Metal Burst are excluded: they depend too much on the opponent's move type and power.
- "KO in n" is guaranteed even at the lowest roll; "n hits (p%)" is the chance at higher rolls.
- Factors that actually affected each number (weather, terrain, Intimidate, survival abilities, healing) are shown in the cells.
| Build 1 | Build 2 | Build 3 | |
|---|---|---|---|
| ↓ | 91.5〜108.5% Body Press 1 hits (50%) | 91.5〜108.5% Body Press 2HKO | 91.5〜108.5% Body Press 1 hits (50%) |
| ↓ | 27.1〜32.2% Knock Off 5HKO (incl. オボンのみ) | 27.1〜32.2% Knock Off 5HKO (incl. オボンのみ) | 35.0〜41.8% Knock Off 4HKO (incl. オボンのみ) |
| Speed | Second S84 / S262 | Second S84 / S175 | Second S84 / S175 |
| Verdict | ◎ Win: 2HKO to KO / 5HKO to be KOed, moves second | ◎ Win: 2HKO to KO / 5HKO to be KOed, moves second | ◎ Win: 2HKO to KO / 4HKO to be KOed, moves second |
Orthworm's build: Leftovers, Impish, H32 B25 S9
Hits-to-KO, Speed, and win/loss for each side's best move against 3 known Meowscarada build(s).
Assumptions
- Switching, status moves and the opponent's counterattack are not included.
- Moves are treated as always hitting (accuracy is ignored).
- Only guaranteed criticals and guaranteed secondary effects apply (e.g. Draco Meteor's Sp. Atk drop).
- Multi-hit moves use a fixed count: 3 for 2-5 hit moves (the expected value), and the maximum for moves that roll accuracy per hit (Triple Axel, Population Bomb), since hits always land here.
- Counter, Mirror Coat and Metal Burst are excluded: they depend too much on the opponent's move type and power.
- "KO in n" is guaranteed even at the lowest roll; "n hits (p%)" is the chance at higher rolls.
- Factors that actually affected each number (weather, terrain, Intimidate, survival abilities, healing) are shown in the cells.
| Build 1 | Build 2 | Build 3 | |
|---|---|---|---|
| ↓ | 91.5〜108.5% Body Press 1 hits (50%) | 91.5〜108.5% Body Press 2HKO | 91.5〜108.5% Body Press 1 hits (50%) |
| ↓ | 27.1〜32.2% Knock Off 5HKO (incl. たべのこし) | 27.1〜32.2% Knock Off 5HKO (incl. たべのこし) | 35.0〜41.8% Knock Off 4HKO (incl. たべのこし) |
| Speed | Second S94 / S262 | Second S94 / S175 | Second S94 / S175 |
| Verdict | ◎ Win: 2HKO to KO / 5HKO to be KOed, moves second | ◎ Win: 2HKO to KO / 5HKO to be KOed, moves second | ◎ Win: 2HKO to KO / 4HKO to be KOed, moves second |
Orthworm's build: Mental Herb, Impish, H32 B25 S9
Hits-to-KO, Speed, and win/loss for each side's best move against 3 known Meowscarada build(s).
Assumptions
- Switching, status moves and the opponent's counterattack are not included.
- Moves are treated as always hitting (accuracy is ignored).
- Only guaranteed criticals and guaranteed secondary effects apply (e.g. Draco Meteor's Sp. Atk drop).
- Multi-hit moves use a fixed count: 3 for 2-5 hit moves (the expected value), and the maximum for moves that roll accuracy per hit (Triple Axel, Population Bomb), since hits always land here.
- Counter, Mirror Coat and Metal Burst are excluded: they depend too much on the opponent's move type and power.
- "KO in n" is guaranteed even at the lowest roll; "n hits (p%)" is the chance at higher rolls.
- Factors that actually affected each number (weather, terrain, Intimidate, survival abilities, healing) are shown in the cells.
| Build 1 | Build 2 | Build 3 | |
|---|---|---|---|
| ↓ | 91.5〜108.5% Body Press 1 hits (50%) | 91.5〜108.5% Body Press 2HKO | 91.5〜108.5% Body Press 1 hits (50%) |
| ↓ | 27.1〜32.2% Knock Off 5HKO | 27.1〜32.2% Knock Off 5HKO | 35.0〜41.8% Knock Off 4HKO |
| Speed | Second S94 / S262 | Second S94 / S175 | Second S94 / S175 |
| Verdict | ◎ Win: 2HKO to KO / 5HKO to be KOed, moves second | ◎ Win: 2HKO to KO / 5HKO to be KOed, moves second | ◎ Win: 2HKO to KO / 4HKO to be KOed, moves second |
 ◎*Farigiraf
Orthworm vs Farigiraf Orthworm's build: Sitrus Berry, Relaxed, H32 B25 S9
Hits-to-KO, Speed, and win/loss for each side's best move against 3 known Farigiraf build(s).
Assumptions
- Switching, status moves and the opponent's counterattack are not included.
- Moves are treated as always hitting (accuracy is ignored).
- Only guaranteed criticals and guaranteed secondary effects apply (e.g. Draco Meteor's Sp. Atk drop).
- Multi-hit moves use a fixed count: 3 for 2-5 hit moves (the expected value), and the maximum for moves that roll accuracy per hit (Triple Axel, Population Bomb), since hits always land here.
- Counter, Mirror Coat and Metal Burst are excluded: they depend too much on the opponent's move type and power.
- "KO in n" is guaranteed even at the lowest roll; "n hits (p%)" is the chance at higher rolls.
- Factors that actually affected each number (weather, terrain, Intimidate, survival abilities, healing) are shown in the cells.
| Build 1 | Build 2 | Build 3 | |
|---|---|---|---|
| ↓ | 90.6〜108.2% Earthquake 2HKO | 54.7〜65.3% Earthquake 2HKO | 54.1〜65.4% Iron Head 2HKO |
| ↓ | 30.5〜36.7% Power Gem 4 hits (>99%) (incl. オボンのみ) | 25.4〜30.5% Power Gem 5HKO (incl. オボンのみ) | 33.9〜40.1% Power Gem 4HKO (incl. オボンのみ) |
| Speed | Second S84 / S151 | Second S84 / S106 | Second S84 / S138 |
| Verdict | ◎ Win: 2HKO to KO / 5HKO to be KOed, moves second | ◎ Win: 2HKO to KO / 5HKO to be KOed, moves second | ◎ Win: 2HKO to KO / 4HKO to be KOed, moves second |
Orthworm's build: Leftovers, Impish, H32 B25 S9
Hits-to-KO, Speed, and win/loss for each side's best move against 3 known Farigiraf build(s).
Assumptions
- Switching, status moves and the opponent's counterattack are not included.
- Moves are treated as always hitting (accuracy is ignored).
- Only guaranteed criticals and guaranteed secondary effects apply (e.g. Draco Meteor's Sp. Atk drop).
- Multi-hit moves use a fixed count: 3 for 2-5 hit moves (the expected value), and the maximum for moves that roll accuracy per hit (Triple Axel, Population Bomb), since hits always land here.
- Counter, Mirror Coat and Metal Burst are excluded: they depend too much on the opponent's move type and power.
- "KO in n" is guaranteed even at the lowest roll; "n hits (p%)" is the chance at higher rolls.
- Factors that actually affected each number (weather, terrain, Intimidate, survival abilities, healing) are shown in the cells.
| Build 1 | Build 2 | Build 3 | |
|---|---|---|---|
| ↓ | 90.6〜108.2% Earthquake 2HKO | 54.7〜65.3% Earthquake 2HKO | 54.1〜65.4% Iron Head 2HKO |
| ↓ | 30.5〜36.7% Power Gem 4HKO | 25.4〜30.5% Power Gem 4 hits (<1%) | 33.9〜40.1% Power Gem 3 hits (33%) |
| Speed | Second S94 / S151 | Second S94 / S106 | Second S94 / S138 |
| Verdict | ◎ Win: 2HKO to KO / 4HKO to be KOed, moves second | ◎ Win: 2HKO to KO / 5HKO to be KOed, moves second | ◎ Win: 2HKO to KO / 4HKO to be KOed, moves second |
Orthworm's build: Mental Herb, Impish, H32 B25 S9
Hits-to-KO, Speed, and win/loss for each side's best move against 3 known Farigiraf build(s).
Assumptions
- Switching, status moves and the opponent's counterattack are not included.
- Moves are treated as always hitting (accuracy is ignored).
- Only guaranteed criticals and guaranteed secondary effects apply (e.g. Draco Meteor's Sp. Atk drop).
- Multi-hit moves use a fixed count: 3 for 2-5 hit moves (the expected value), and the maximum for moves that roll accuracy per hit (Triple Axel, Population Bomb), since hits always land here.
- Counter, Mirror Coat and Metal Burst are excluded: they depend too much on the opponent's move type and power.
- "KO in n" is guaranteed even at the lowest roll; "n hits (p%)" is the chance at higher rolls.
- Factors that actually affected each number (weather, terrain, Intimidate, survival abilities, healing) are shown in the cells.
| Build 1 | Build 2 | Build 3 | |
|---|---|---|---|
| ↓ | 90.6〜108.2% Earthquake 2HKO | 54.7〜65.3% Earthquake 2HKO | 54.1〜65.4% Iron Head 2HKO |
| ↓ | 30.5〜36.7% Power Gem 3 hits (66%) | 25.4〜30.5% Power Gem 4HKO | 33.9〜40.1% Power Gem 3HKO |
| Speed | Second S94 / S151 | Second S94 / S106 | Second S94 / S138 |
| Verdict | ◎ Win: 2HKO to KO / 4HKO to be KOed, moves second | ◎ Win: 2HKO to KO / 4HKO to be KOed, moves second | ○ Win: 2HKO to KO / 3HKO to be KOed, moves second |
 ◎A-Ninetales
Orthworm vs A-Ninetales Orthworm's build: Sitrus Berry, Relaxed, H32 B25 S9
Hits-to-KO, Speed, and win/loss for each side's best move against 2 known A-Ninetales build(s).
Assumptions
- Switching, status moves and the opponent's counterattack are not included.
- Moves are treated as always hitting (accuracy is ignored).
- Only guaranteed criticals and guaranteed secondary effects apply (e.g. Draco Meteor's Sp. Atk drop).
- Multi-hit moves use a fixed count: 3 for 2-5 hit moves (the expected value), and the maximum for moves that roll accuracy per hit (Triple Axel, Population Bomb), since hits always land here.
- Counter, Mirror Coat and Metal Burst are excluded: they depend too much on the opponent's move type and power.
- "KO in n" is guaranteed even at the lowest roll; "n hits (p%)" is the chance at higher rolls.
- Factors that actually affected each number (weather, terrain, Intimidate, survival abilities, healing) are shown in the cells.
| Build 1 | Build 2 | |
|---|---|---|
| ↓ | 75.4〜89.1% Iron Head 2HKOcalculated with あられ | 90.7〜112.0% Iron Head 1 hits (50%)calculated with あられ |
| ↓ | 23.7〜28.2% Blizzard 999HKOcalculated with あられ | 30.5〜36.7% Blizzard 4 hits (>99%) (incl. オボンのみ)calculated with あられ |
| Speed | Second S84 / S177 | Second S84 / S177 |
| Verdict | ◎ Win: 2HKO to KO / n/a to be KOed, moves second | ◎ Win: 2HKO to KO / 5HKO to be KOed, moves second |
Orthworm's build: Leftovers, Impish, H32 B25 S9
Hits-to-KO, Speed, and win/loss for each side's best move against 2 known A-Ninetales build(s).
Assumptions
- Switching, status moves and the opponent's counterattack are not included.
- Moves are treated as always hitting (accuracy is ignored).
- Only guaranteed criticals and guaranteed secondary effects apply (e.g. Draco Meteor's Sp. Atk drop).
- Multi-hit moves use a fixed count: 3 for 2-5 hit moves (the expected value), and the maximum for moves that roll accuracy per hit (Triple Axel, Population Bomb), since hits always land here.
- Counter, Mirror Coat and Metal Burst are excluded: they depend too much on the opponent's move type and power.
- "KO in n" is guaranteed even at the lowest roll; "n hits (p%)" is the chance at higher rolls.
- Factors that actually affected each number (weather, terrain, Intimidate, survival abilities, healing) are shown in the cells.
| Build 1 | Build 2 | |
|---|---|---|
| ↓ | 75.4〜89.1% Iron Head 2HKOcalculated with あられ | 90.7〜112.0% Iron Head 1 hits (50%)calculated with あられ |
| ↓ | 23.7〜28.2% Blizzard 999HKOcalculated with あられ | 30.5〜36.7% Blizzard 4HKOcalculated with あられ |
| Speed | Second S94 / S177 | Second S94 / S177 |
| Verdict | ◎ Win: 2HKO to KO / n/a to be KOed, moves second | ◎ Win: 2HKO to KO / 4HKO to be KOed, moves second |
Orthworm's build: Mental Herb, Impish, H32 B25 S9
Hits-to-KO, Speed, and win/loss for each side's best move against 2 known A-Ninetales build(s).
Assumptions
- Switching, status moves and the opponent's counterattack are not included.
- Moves are treated as always hitting (accuracy is ignored).
- Only guaranteed criticals and guaranteed secondary effects apply (e.g. Draco Meteor's Sp. Atk drop).
- Multi-hit moves use a fixed count: 3 for 2-5 hit moves (the expected value), and the maximum for moves that roll accuracy per hit (Triple Axel, Population Bomb), since hits always land here.
- Counter, Mirror Coat and Metal Burst are excluded: they depend too much on the opponent's move type and power.
- "KO in n" is guaranteed even at the lowest roll; "n hits (p%)" is the chance at higher rolls.
- Factors that actually affected each number (weather, terrain, Intimidate, survival abilities, healing) are shown in the cells.
| Build 1 | Build 2 | |
|---|---|---|
| ↓ | 75.4〜89.1% Iron Head 2HKOcalculated with あられ | 90.7〜112.0% Iron Head 1 hits (50%)calculated with あられ |
| ↓ | 23.7〜28.2% Blizzard 4 hits (90%)calculated with あられ | 30.5〜36.7% Blizzard 3 hits (66%)calculated with あられ |
| Speed | Second S94 / S177 | Second S94 / S177 |
| Verdict | ◎ Win: 2HKO to KO / 5HKO to be KOed, moves second | ◎ Win: 2HKO to KO / 4HKO to be KOed, moves second |
 ×ボーマンダ
Orthworm vs ボーマンダ Orthworm's build: Sitrus Berry, Relaxed, H32 B25 S9
Hits-to-KO, Speed, and win/loss for each side's best move against 1 known ボーマンダ build(s).
Assumptions
- Switching, status moves and the opponent's counterattack are not included.
- Moves are treated as always hitting (accuracy is ignored).
- Only guaranteed criticals and guaranteed secondary effects apply (e.g. Draco Meteor's Sp. Atk drop).
- Multi-hit moves use a fixed count: 3 for 2-5 hit moves (the expected value), and the maximum for moves that roll accuracy per hit (Triple Axel, Population Bomb), since hits always land here.
- Counter, Mirror Coat and Metal Burst are excluded: they depend too much on the opponent's move type and power.
- "KO in n" is guaranteed even at the lowest roll; "n hits (p%)" is the chance at higher rolls.
- Factors that actually affected each number (weather, terrain, Intimidate, survival abilities, healing) are shown in the cells.
| Build 1 | |
|---|---|
| ↓ | 19.9〜23.4% Rock Tomb 999HKO |
| ↓ | 79.1〜93.8% Fire Blast 2HKO |
| Speed | Second S84 / S172 |
| Verdict | × Loss: n/a to KO / 2HKO to be KOed, moves second |
Orthworm's build: Leftovers, Impish, H32 B25 S9
Hits-to-KO, Speed, and win/loss for each side's best move against 1 known ボーマンダ build(s).
Assumptions
- Switching, status moves and the opponent's counterattack are not included.
- Moves are treated as always hitting (accuracy is ignored).
- Only guaranteed criticals and guaranteed secondary effects apply (e.g. Draco Meteor's Sp. Atk drop).
- Multi-hit moves use a fixed count: 3 for 2-5 hit moves (the expected value), and the maximum for moves that roll accuracy per hit (Triple Axel, Population Bomb), since hits always land here.
- Counter, Mirror Coat and Metal Burst are excluded: they depend too much on the opponent's move type and power.
- "KO in n" is guaranteed even at the lowest roll; "n hits (p%)" is the chance at higher rolls.
- Factors that actually affected each number (weather, terrain, Intimidate, survival abilities, healing) are shown in the cells.
| Build 1 | |
|---|---|
| ↓ | 19.9〜23.4% Rock Tomb 999HKO |
| ↓ | 79.1〜93.8% Fire Blast 2HKO |
| Speed | Second S94 / S172 |
| Verdict | × Loss: n/a to KO / 2HKO to be KOed, moves second |
Orthworm's build: Mental Herb, Impish, H32 B25 S9
Hits-to-KO, Speed, and win/loss for each side's best move against 1 known ボーマンダ build(s).
Assumptions
- Switching, status moves and the opponent's counterattack are not included.
- Moves are treated as always hitting (accuracy is ignored).
- Only guaranteed criticals and guaranteed secondary effects apply (e.g. Draco Meteor's Sp. Atk drop).
- Multi-hit moves use a fixed count: 3 for 2-5 hit moves (the expected value), and the maximum for moves that roll accuracy per hit (Triple Axel, Population Bomb), since hits always land here.
- Counter, Mirror Coat and Metal Burst are excluded: they depend too much on the opponent's move type and power.
- "KO in n" is guaranteed even at the lowest roll; "n hits (p%)" is the chance at higher rolls.
- Factors that actually affected each number (weather, terrain, Intimidate, survival abilities, healing) are shown in the cells.
| Build 1 | |
|---|---|
| ↓ | 19.9〜23.4% Rock Tomb 999HKO |
| ↓ | 79.1〜93.8% Fire Blast 2HKO |
| Speed | Second S94 / S172 |
| Verdict | × Loss: n/a to KO / 2HKO to be KOed, moves second |
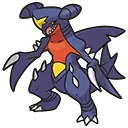 ▲*Garchomp
Orthworm vs Garchomp Orthworm's build: Sitrus Berry, Relaxed, H32 B25 S9
Hits-to-KO, Speed, and win/loss for each side's best move against 3 known Garchomp build(s).
Assumptions
- Switching, status moves and the opponent's counterattack are not included.
- Moves are treated as always hitting (accuracy is ignored).
- Only guaranteed criticals and guaranteed secondary effects apply (e.g. Draco Meteor's Sp. Atk drop).
- Multi-hit moves use a fixed count: 3 for 2-5 hit moves (the expected value), and the maximum for moves that roll accuracy per hit (Triple Axel, Population Bomb), since hits always land here.
- Counter, Mirror Coat and Metal Burst are excluded: they depend too much on the opponent's move type and power.
- "KO in n" is guaranteed even at the lowest roll; "n hits (p%)" is the chance at higher rolls.
- Factors that actually affected each number (weather, terrain, Intimidate, survival abilities, healing) are shown in the cells.
| Build 1 | Build 2 | Build 3 | |
|---|---|---|---|
| ↓ | 33.0〜38.9% Body Press 3 hits (>99%) | 29.7〜35.1% Body Press 3 hits (16%) | 29.7〜35.1% Body Press 3 hits (16%) |
| ↓ | 98.3〜116.4% Flamethrower 1 hits (88%) | 46.3〜55.4% Flamethrower 3HKO | 46.3〜55.4% Flamethrower 3HKO |
| Speed | Second S84 / S223 | Second S84 / S231 | Second S84 / S154 |
| Verdict | × Loss: 4HKO to KO / 2HKO to be KOed, moves second | ▲ Loss: 4HKO to KO / 3HKO to be KOed, moves second | ▲ Loss: 4HKO to KO / 3HKO to be KOed, moves second |
Orthworm's build: Leftovers, Impish, H32 B25 S9
Hits-to-KO, Speed, and win/loss for each side's best move against 3 known Garchomp build(s).
Assumptions
- Switching, status moves and the opponent's counterattack are not included.
- Moves are treated as always hitting (accuracy is ignored).
- Only guaranteed criticals and guaranteed secondary effects apply (e.g. Draco Meteor's Sp. Atk drop).
- Multi-hit moves use a fixed count: 3 for 2-5 hit moves (the expected value), and the maximum for moves that roll accuracy per hit (Triple Axel, Population Bomb), since hits always land here.
- Counter, Mirror Coat and Metal Burst are excluded: they depend too much on the opponent's move type and power.
- "KO in n" is guaranteed even at the lowest roll; "n hits (p%)" is the chance at higher rolls.
- Factors that actually affected each number (weather, terrain, Intimidate, survival abilities, healing) are shown in the cells.
| Build 1 | Build 2 | Build 3 | |
|---|---|---|---|
| ↓ | 33.0〜38.9% Body Press 3 hits (>99%) | 29.7〜35.1% Body Press 3 hits (16%) | 29.7〜35.1% Body Press 3 hits (16%) |
| ↓ | 98.3〜116.4% Flamethrower 1 hits (88%) | 46.3〜55.4% Flamethrower 2 hits (16%) | 46.3〜55.4% Flamethrower 2 hits (16%) |
| Speed | Second S94 / S223 | Second S94 / S231 | Second S94 / S154 |
| Verdict | × Loss: 4HKO to KO / 2HKO to be KOed, moves second | ▲ Loss: 4HKO to KO / 3HKO to be KOed, moves second | ▲ Loss: 4HKO to KO / 3HKO to be KOed, moves second |
Orthworm's build: Mental Herb, Impish, H32 B25 S9
Hits-to-KO, Speed, and win/loss for each side's best move against 3 known Garchomp build(s).
Assumptions
- Switching, status moves and the opponent's counterattack are not included.
- Moves are treated as always hitting (accuracy is ignored).
- Only guaranteed criticals and guaranteed secondary effects apply (e.g. Draco Meteor's Sp. Atk drop).
- Multi-hit moves use a fixed count: 3 for 2-5 hit moves (the expected value), and the maximum for moves that roll accuracy per hit (Triple Axel, Population Bomb), since hits always land here.
- Counter, Mirror Coat and Metal Burst are excluded: they depend too much on the opponent's move type and power.
- "KO in n" is guaranteed even at the lowest roll; "n hits (p%)" is the chance at higher rolls.
- Factors that actually affected each number (weather, terrain, Intimidate, survival abilities, healing) are shown in the cells.
| Build 1 | Build 2 | Build 3 | |
|---|---|---|---|
| ↓ | 33.0〜38.9% Body Press 3 hits (>99%) | 29.7〜35.1% Body Press 3 hits (16%) | 29.7〜35.1% Body Press 3 hits (16%) |
| ↓ | 98.3〜116.4% Flamethrower 1 hits (88%) | 46.3〜55.4% Flamethrower 2 hits (67%) | 46.3〜55.4% Flamethrower 2 hits (67%) |
| Speed | Second S94 / S223 | Second S94 / S231 | Second S94 / S154 |
| Verdict | × Loss: 4HKO to KO / 2HKO to be KOed, moves second | ▲ Loss: 4HKO to KO / 3HKO to be KOed, moves second | ▲ Loss: 4HKO to KO / 3HKO to be KOed, moves second |
 ×Primarina
Orthworm vs Primarina Orthworm's build: Sitrus Berry, Relaxed, H32 B25 S9
Hits-to-KO, Speed, and win/loss for each side's best move against 3 known Primarina build(s).
Assumptions
- Switching, status moves and the opponent's counterattack are not included.
- Moves are treated as always hitting (accuracy is ignored).
- Only guaranteed criticals and guaranteed secondary effects apply (e.g. Draco Meteor's Sp. Atk drop).
- Multi-hit moves use a fixed count: 3 for 2-5 hit moves (the expected value), and the maximum for moves that roll accuracy per hit (Triple Axel, Population Bomb), since hits always land here.
- Counter, Mirror Coat and Metal Burst are excluded: they depend too much on the opponent's move type and power.
- "KO in n" is guaranteed even at the lowest roll; "n hits (p%)" is the chance at higher rolls.
- Factors that actually affected each number (weather, terrain, Intimidate, survival abilities, healing) are shown in the cells.
| Build 1 | Build 2 | Build 3 | |
|---|---|---|---|
| ↓ | 20.9〜24.6% Iron Head 999HKO | 27.3〜32.6% Iron Head 4 hits (7%) | 20.9〜24.6% Iron Head 999HKO |
| ↓ | 61.6〜72.9% Sparkling Aria 2 hits (97%) | 74.6〜88.1% Sparkling Aria 2HKO | 61.6〜72.9% Sparkling Aria 2 hits (97%) |
| Speed | First S84 / S80 | First S84 / S82 | First S84 / S80 |
| Verdict | × Loss: n/a to KO / 3HKO to be KOed, moves first | × Loss: 5HKO to KO / 2HKO to be KOed, moves first | × Loss: n/a to KO / 3HKO to be KOed, moves first |
Orthworm's build: Leftovers, Impish, H32 B25 S9
Hits-to-KO, Speed, and win/loss for each side's best move against 3 known Primarina build(s).
Assumptions
- Switching, status moves and the opponent's counterattack are not included.
- Moves are treated as always hitting (accuracy is ignored).
- Only guaranteed criticals and guaranteed secondary effects apply (e.g. Draco Meteor's Sp. Atk drop).
- Multi-hit moves use a fixed count: 3 for 2-5 hit moves (the expected value), and the maximum for moves that roll accuracy per hit (Triple Axel, Population Bomb), since hits always land here.
- Counter, Mirror Coat and Metal Burst are excluded: they depend too much on the opponent's move type and power.
- "KO in n" is guaranteed even at the lowest roll; "n hits (p%)" is the chance at higher rolls.
- Factors that actually affected each number (weather, terrain, Intimidate, survival abilities, healing) are shown in the cells.
| Build 1 | Build 2 | Build 3 | |
|---|---|---|---|
| ↓ | 20.9〜24.6% Iron Head 999HKO | 27.3〜32.6% Iron Head 4 hits (7%) | 20.9〜24.6% Iron Head 999HKO |
| ↓ | 61.6〜72.9% Sparkling Aria 2HKO | 74.6〜88.1% Sparkling Aria 2HKO | 61.6〜72.9% Sparkling Aria 2HKO |
| Speed | First S94 / S80 | First S94 / S82 | First S94 / S80 |
| Verdict | × Loss: n/a to KO / 2HKO to be KOed, moves first | × Loss: 5HKO to KO / 2HKO to be KOed, moves first | × Loss: n/a to KO / 2HKO to be KOed, moves first |
Orthworm's build: Mental Herb, Impish, H32 B25 S9
Hits-to-KO, Speed, and win/loss for each side's best move against 3 known Primarina build(s).
Assumptions
- Switching, status moves and the opponent's counterattack are not included.
- Moves are treated as always hitting (accuracy is ignored).
- Only guaranteed criticals and guaranteed secondary effects apply (e.g. Draco Meteor's Sp. Atk drop).
- Multi-hit moves use a fixed count: 3 for 2-5 hit moves (the expected value), and the maximum for moves that roll accuracy per hit (Triple Axel, Population Bomb), since hits always land here.
- Counter, Mirror Coat and Metal Burst are excluded: they depend too much on the opponent's move type and power.
- "KO in n" is guaranteed even at the lowest roll; "n hits (p%)" is the chance at higher rolls.
- Factors that actually affected each number (weather, terrain, Intimidate, survival abilities, healing) are shown in the cells.
| Build 1 | Build 2 | Build 3 | |
|---|---|---|---|
| ↓ | 20.9〜24.6% Iron Head 999HKO | 27.3〜32.6% Iron Head 4 hits (7%) | 20.9〜24.6% Iron Head 999HKO |
| ↓ | 61.6〜72.9% Sparkling Aria 2HKO | 74.6〜88.1% Sparkling Aria 2HKO | 61.6〜72.9% Sparkling Aria 2HKO |
| Speed | First S94 / S80 | First S94 / S82 | First S94 / S80 |
| Verdict | × Loss: n/a to KO / 2HKO to be KOed, moves first | × Loss: 5HKO to KO / 2HKO to be KOed, moves first | × Loss: n/a to KO / 2HKO to be KOed, moves first |
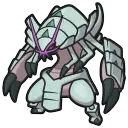 ×グソクムシャ
Orthworm vs グソクムシャ Orthworm's build: Sitrus Berry, Relaxed, H32 B25 S9
Hits-to-KO, Speed, and win/loss for each side's best move against 1 known グソクムシャ build(s).
Assumptions
- Switching, status moves and the opponent's counterattack are not included.
- Moves are treated as always hitting (accuracy is ignored).
- Only guaranteed criticals and guaranteed secondary effects apply (e.g. Draco Meteor's Sp. Atk drop).
- Multi-hit moves use a fixed count: 3 for 2-5 hit moves (the expected value), and the maximum for moves that roll accuracy per hit (Triple Axel, Population Bomb), since hits always land here.
- Counter, Mirror Coat and Metal Burst are excluded: they depend too much on the opponent's move type and power.
- "KO in n" is guaranteed even at the lowest roll; "n hits (p%)" is the chance at higher rolls.
- Factors that actually affected each number (weather, terrain, Intimidate, survival abilities, healing) are shown in the cells.
| Build 1 | |
|---|---|
| ↓ | 18.1〜21.4% Body Press 999HKO |
| ↓ | 71.8〜84.7% Close Combat 2HKO |
| Speed | First S84 / S60 |
| Verdict | × Loss: n/a to KO / 2HKO to be KOed, moves first |
Orthworm's build: Leftovers, Impish, H32 B25 S9
Hits-to-KO, Speed, and win/loss for each side's best move against 1 known グソクムシャ build(s).
Assumptions
- Switching, status moves and the opponent's counterattack are not included.
- Moves are treated as always hitting (accuracy is ignored).
- Only guaranteed criticals and guaranteed secondary effects apply (e.g. Draco Meteor's Sp. Atk drop).
- Multi-hit moves use a fixed count: 3 for 2-5 hit moves (the expected value), and the maximum for moves that roll accuracy per hit (Triple Axel, Population Bomb), since hits always land here.
- Counter, Mirror Coat and Metal Burst are excluded: they depend too much on the opponent's move type and power.
- "KO in n" is guaranteed even at the lowest roll; "n hits (p%)" is the chance at higher rolls.
- Factors that actually affected each number (weather, terrain, Intimidate, survival abilities, healing) are shown in the cells.
| Build 1 | |
|---|---|
| ↓ | 18.1〜21.4% Body Press 999HKO |
| ↓ | 71.8〜84.7% Close Combat 2HKO |
| Speed | First S94 / S60 |
| Verdict | × Loss: n/a to KO / 2HKO to be KOed, moves first |
Orthworm's build: Mental Herb, Impish, H32 B25 S9
Hits-to-KO, Speed, and win/loss for each side's best move against 1 known グソクムシャ build(s).
Assumptions
- Switching, status moves and the opponent's counterattack are not included.
- Moves are treated as always hitting (accuracy is ignored).
- Only guaranteed criticals and guaranteed secondary effects apply (e.g. Draco Meteor's Sp. Atk drop).
- Multi-hit moves use a fixed count: 3 for 2-5 hit moves (the expected value), and the maximum for moves that roll accuracy per hit (Triple Axel, Population Bomb), since hits always land here.
- Counter, Mirror Coat and Metal Burst are excluded: they depend too much on the opponent's move type and power.
- "KO in n" is guaranteed even at the lowest roll; "n hits (p%)" is the chance at higher rolls.
- Factors that actually affected each number (weather, terrain, Intimidate, survival abilities, healing) are shown in the cells.
| Build 1 | |
|---|---|
| ↓ | 18.1〜21.4% Body Press 999HKO |
| ↓ | 71.8〜84.7% Close Combat 2HKO |
| Speed | First S94 / S60 |
| Verdict | × Loss: n/a to KO / 2HKO to be KOed, moves first |
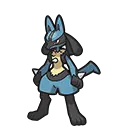 ×Lucario
Orthworm vs Lucario Orthworm's build: Sitrus Berry, Relaxed, H32 B25 S9
Hits-to-KO, Speed, and win/loss for each side's best move against 2 known Lucario build(s).
Assumptions
- Switching, status moves and the opponent's counterattack are not included.
- Moves are treated as always hitting (accuracy is ignored).
- Only guaranteed criticals and guaranteed secondary effects apply (e.g. Draco Meteor's Sp. Atk drop).
- Multi-hit moves use a fixed count: 3 for 2-5 hit moves (the expected value), and the maximum for moves that roll accuracy per hit (Triple Axel, Population Bomb), since hits always land here.
- Counter, Mirror Coat and Metal Burst are excluded: they depend too much on the opponent's move type and power.
- "KO in n" is guaranteed even at the lowest roll; "n hits (p%)" is the chance at higher rolls.
- Factors that actually affected each number (weather, terrain, Intimidate, survival abilities, healing) are shown in the cells.
| Build 1 | Build 2 | |
|---|---|---|
| ↓ | 61.2〜72.1% Earthquake 2HKO | 80.3〜95.2% Body Press 2HKO |
| ↓ | 146.9〜174.0% Aura Sphere 1HKO | 176.3〜207.9% Aura Sphere 1HKO |
| Speed | Second S84 / S223 | Second S84 / S180 |
| Verdict | × Loss: 2HKO to KO / 1HKO to be KOed, moves second | × Loss: 2HKO to KO / 1HKO to be KOed, moves second |
Orthworm's build: Leftovers, Impish, H32 B25 S9
Hits-to-KO, Speed, and win/loss for each side's best move against 2 known Lucario build(s).
Assumptions
- Switching, status moves and the opponent's counterattack are not included.
- Moves are treated as always hitting (accuracy is ignored).
- Only guaranteed criticals and guaranteed secondary effects apply (e.g. Draco Meteor's Sp. Atk drop).
- Multi-hit moves use a fixed count: 3 for 2-5 hit moves (the expected value), and the maximum for moves that roll accuracy per hit (Triple Axel, Population Bomb), since hits always land here.
- Counter, Mirror Coat and Metal Burst are excluded: they depend too much on the opponent's move type and power.
- "KO in n" is guaranteed even at the lowest roll; "n hits (p%)" is the chance at higher rolls.
- Factors that actually affected each number (weather, terrain, Intimidate, survival abilities, healing) are shown in the cells.
| Build 1 | Build 2 | |
|---|---|---|
| ↓ | 61.2〜72.1% Earthquake 2HKO | 80.3〜95.2% Body Press 2HKO |
| ↓ | 146.9〜174.0% Aura Sphere 1HKO | 176.3〜207.9% Aura Sphere 1HKO |
| Speed | Second S94 / S223 | Second S94 / S180 |
| Verdict | × Loss: 2HKO to KO / 1HKO to be KOed, moves second | × Loss: 2HKO to KO / 1HKO to be KOed, moves second |
Orthworm's build: Mental Herb, Impish, H32 B25 S9
Hits-to-KO, Speed, and win/loss for each side's best move against 2 known Lucario build(s).
Assumptions
- Switching, status moves and the opponent's counterattack are not included.
- Moves are treated as always hitting (accuracy is ignored).
- Only guaranteed criticals and guaranteed secondary effects apply (e.g. Draco Meteor's Sp. Atk drop).
- Multi-hit moves use a fixed count: 3 for 2-5 hit moves (the expected value), and the maximum for moves that roll accuracy per hit (Triple Axel, Population Bomb), since hits always land here.
- Counter, Mirror Coat and Metal Burst are excluded: they depend too much on the opponent's move type and power.
- "KO in n" is guaranteed even at the lowest roll; "n hits (p%)" is the chance at higher rolls.
- Factors that actually affected each number (weather, terrain, Intimidate, survival abilities, healing) are shown in the cells.
| Build 1 | Build 2 | |
|---|---|---|
| ↓ | 61.2〜72.1% Earthquake 2HKO | 80.3〜95.2% Body Press 2HKO |
| ↓ | 146.9〜174.0% Aura Sphere 1HKO | 176.3〜207.9% Aura Sphere 1HKO |
| Speed | Second S94 / S223 | Second S94 / S180 |
| Verdict | × Loss: 2HKO to KO / 1HKO to be KOed, moves second | × Loss: 2HKO to KO / 1HKO to be KOed, moves second |
 ×Gholdengo
Orthworm vs Gholdengo Orthworm's build: Sitrus Berry, Relaxed, H32 B25 S9
Hits-to-KO, Speed, and win/loss for each side's best move against 3 known Gholdengo build(s).
Assumptions
- Switching, status moves and the opponent's counterattack are not included.
- Moves are treated as always hitting (accuracy is ignored).
- Only guaranteed criticals and guaranteed secondary effects apply (e.g. Draco Meteor's Sp. Atk drop).
- Multi-hit moves use a fixed count: 3 for 2-5 hit moves (the expected value), and the maximum for moves that roll accuracy per hit (Triple Axel, Population Bomb), since hits always land here.
- Counter, Mirror Coat and Metal Burst are excluded: they depend too much on the opponent's move type and power.
- "KO in n" is guaranteed even at the lowest roll; "n hits (p%)" is the chance at higher rolls.
- Factors that actually affected each number (weather, terrain, Intimidate, survival abilities, healing) are shown in the cells.
| Build 1 | Build 2 | Build 3 | |
|---|---|---|---|
| ↓ | 12.9〜14.7% Iron Head 999HKO | 9.3〜11.4% Iron Head 999HKO | 39.3〜46.6% Earthquake 3HKO |
| ↓ | 137.9〜162.7% Focus Blast 1HKO | 104.0〜123.2% Focus Blast 1HKO | 126.6〜149.2% Focus Blast 1HKO |
| Speed | Second S84 / S136 | Second S84 / S107 | Second S84 / S136 |
| Verdict | × Loss: 4HKO to KO / 1HKO to be KOed, moves second | × Loss: 4HKO to KO / 1HKO to be KOed, moves second | × Loss: 3HKO to KO / 1HKO to be KOed, moves second |
Orthworm's build: Leftovers, Impish, H32 B25 S9
Hits-to-KO, Speed, and win/loss for each side's best move against 3 known Gholdengo build(s).
Assumptions
- Switching, status moves and the opponent's counterattack are not included.
- Moves are treated as always hitting (accuracy is ignored).
- Only guaranteed criticals and guaranteed secondary effects apply (e.g. Draco Meteor's Sp. Atk drop).
- Multi-hit moves use a fixed count: 3 for 2-5 hit moves (the expected value), and the maximum for moves that roll accuracy per hit (Triple Axel, Population Bomb), since hits always land here.
- Counter, Mirror Coat and Metal Burst are excluded: they depend too much on the opponent's move type and power.
- "KO in n" is guaranteed even at the lowest roll; "n hits (p%)" is the chance at higher rolls.
- Factors that actually affected each number (weather, terrain, Intimidate, survival abilities, healing) are shown in the cells.
| Build 1 | Build 2 | Build 3 | |
|---|---|---|---|
| ↓ | 12.9〜14.7% Iron Head 999HKO | 9.3〜11.4% Iron Head 999HKO | 39.3〜46.6% Earthquake 3HKO |
| ↓ | 137.9〜162.7% Focus Blast 1HKO | 104.0〜123.2% Focus Blast 1HKO | 126.6〜149.2% Focus Blast 1HKO |
| Speed | Second S94 / S136 | Second S94 / S107 | Second S94 / S136 |
| Verdict | × Loss: 4HKO to KO / 1HKO to be KOed, moves second | × Loss: 4HKO to KO / 1HKO to be KOed, moves second | × Loss: 3HKO to KO / 1HKO to be KOed, moves second |
Orthworm's build: Mental Herb, Impish, H32 B25 S9
Hits-to-KO, Speed, and win/loss for each side's best move against 3 known Gholdengo build(s).
Assumptions
- Switching, status moves and the opponent's counterattack are not included.
- Moves are treated as always hitting (accuracy is ignored).
- Only guaranteed criticals and guaranteed secondary effects apply (e.g. Draco Meteor's Sp. Atk drop).
- Multi-hit moves use a fixed count: 3 for 2-5 hit moves (the expected value), and the maximum for moves that roll accuracy per hit (Triple Axel, Population Bomb), since hits always land here.
- Counter, Mirror Coat and Metal Burst are excluded: they depend too much on the opponent's move type and power.
- "KO in n" is guaranteed even at the lowest roll; "n hits (p%)" is the chance at higher rolls.
- Factors that actually affected each number (weather, terrain, Intimidate, survival abilities, healing) are shown in the cells.
| Build 1 | Build 2 | Build 3 | |
|---|---|---|---|
| ↓ | 12.9〜14.7% Iron Head 999HKO | 9.3〜11.4% Iron Head 999HKO | 39.3〜46.6% Earthquake 3HKO |
| ↓ | 137.9〜162.7% Focus Blast 1HKO | 104.0〜123.2% Focus Blast 1HKO | 126.6〜149.2% Focus Blast 1HKO |
| Speed | Second S94 / S136 | Second S94 / S107 | Second S94 / S136 |
| Verdict | × Loss: 4HKO to KO / 1HKO to be KOed, moves second | × Loss: 4HKO to KO / 1HKO to be KOed, moves second | × Loss: 3HKO to KO / 1HKO to be KOed, moves second |
 ×Baxcalibur
Orthworm vs Baxcalibur Orthworm's build: Sitrus Berry, Relaxed, H32 B25 S9
Hits-to-KO, Speed, and win/loss for each side's best move against 3 known Baxcalibur build(s).
Assumptions
- Switching, status moves and the opponent's counterattack are not included.
- Moves are treated as always hitting (accuracy is ignored).
- Only guaranteed criticals and guaranteed secondary effects apply (e.g. Draco Meteor's Sp. Atk drop).
- Multi-hit moves use a fixed count: 3 for 2-5 hit moves (the expected value), and the maximum for moves that roll accuracy per hit (Triple Axel, Population Bomb), since hits always land here.
- Counter, Mirror Coat and Metal Burst are excluded: they depend too much on the opponent's move type and power.
- "KO in n" is guaranteed even at the lowest roll; "n hits (p%)" is the chance at higher rolls.
- Factors that actually affected each number (weather, terrain, Intimidate, survival abilities, healing) are shown in the cells.
| Build 1 | Build 2 | Build 3 | |
|---|---|---|---|
| ↓ | 42.6〜50.8% Body Press 4 hits (18%) (incl. オボンのみ) | 51.5〜61.1% Body Press 3 hits (22%) (incl. オボンのみ) | 42.6〜50.8% Body Press 4 hits (80%) (incl. たべのこし) |
| ↓ | 66.7〜79.1% Aura Sphere 2HKO | 81.4〜96.0% Aura Sphere 2HKO | 66.7〜79.1% Aura Sphere 2HKO |
| Speed | Second S84 / S105 | Second S84 / S150 | Second S84 / S105 |
| Verdict | × Loss: 5HKO to KO / 2HKO to be KOed, moves second | × Loss: 4HKO to KO / 2HKO to be KOed, moves second | × Loss: 5HKO to KO / 2HKO to be KOed, moves second |
Orthworm's build: Leftovers, Impish, H32 B25 S9
Hits-to-KO, Speed, and win/loss for each side's best move against 3 known Baxcalibur build(s).
Assumptions
- Switching, status moves and the opponent's counterattack are not included.
- Moves are treated as always hitting (accuracy is ignored).
- Only guaranteed criticals and guaranteed secondary effects apply (e.g. Draco Meteor's Sp. Atk drop).
- Multi-hit moves use a fixed count: 3 for 2-5 hit moves (the expected value), and the maximum for moves that roll accuracy per hit (Triple Axel, Population Bomb), since hits always land here.
- Counter, Mirror Coat and Metal Burst are excluded: they depend too much on the opponent's move type and power.
- "KO in n" is guaranteed even at the lowest roll; "n hits (p%)" is the chance at higher rolls.
- Factors that actually affected each number (weather, terrain, Intimidate, survival abilities, healing) are shown in the cells.
| Build 1 | Build 2 | Build 3 | |
|---|---|---|---|
| ↓ | 42.6〜50.8% Body Press 4 hits (18%) (incl. オボンのみ) | 51.5〜61.1% Body Press 3 hits (22%) (incl. オボンのみ) | 42.6〜50.8% Body Press 4 hits (80%) (incl. たべのこし) |
| ↓ | 66.7〜79.1% Aura Sphere 2HKO | 81.4〜96.0% Aura Sphere 2HKO | 66.7〜79.1% Aura Sphere 2HKO |
| Speed | Second S94 / S105 | Second S94 / S150 | Second S94 / S105 |
| Verdict | × Loss: 5HKO to KO / 2HKO to be KOed, moves second | × Loss: 4HKO to KO / 2HKO to be KOed, moves second | × Loss: 5HKO to KO / 2HKO to be KOed, moves second |
Orthworm's build: Mental Herb, Impish, H32 B25 S9
Hits-to-KO, Speed, and win/loss for each side's best move against 3 known Baxcalibur build(s).
Assumptions
- Switching, status moves and the opponent's counterattack are not included.
- Moves are treated as always hitting (accuracy is ignored).
- Only guaranteed criticals and guaranteed secondary effects apply (e.g. Draco Meteor's Sp. Atk drop).
- Multi-hit moves use a fixed count: 3 for 2-5 hit moves (the expected value), and the maximum for moves that roll accuracy per hit (Triple Axel, Population Bomb), since hits always land here.
- Counter, Mirror Coat and Metal Burst are excluded: they depend too much on the opponent's move type and power.
- "KO in n" is guaranteed even at the lowest roll; "n hits (p%)" is the chance at higher rolls.
- Factors that actually affected each number (weather, terrain, Intimidate, survival abilities, healing) are shown in the cells.
| Build 1 | Build 2 | Build 3 | |
|---|---|---|---|
| ↓ | 42.6〜50.8% Body Press 4 hits (18%) (incl. オボンのみ) | 51.5〜61.1% Body Press 3 hits (22%) (incl. オボンのみ) | 42.6〜50.8% Body Press 4 hits (80%) (incl. たべのこし) |
| ↓ | 66.7〜79.1% Aura Sphere 2HKO | 81.4〜96.0% Aura Sphere 2HKO | 66.7〜79.1% Aura Sphere 2HKO |
| Speed | Second S94 / S105 | Second S94 / S150 | Second S94 / S105 |
| Verdict | × Loss: 5HKO to KO / 2HKO to be KOed, moves second | × Loss: 4HKO to KO / 2HKO to be KOed, moves second | × Loss: 5HKO to KO / 2HKO to be KOed, moves second |
 ▲*Aegislash
Orthworm vs Aegislash Orthworm's build: Sitrus Berry, Relaxed, H32 B25 S9
Hits-to-KO, Speed, and win/loss for each side's best move against 3 known Aegislash build(s).
Assumptions
- Switching, status moves and the opponent's counterattack are not included.
- Moves are treated as always hitting (accuracy is ignored).
- Only guaranteed criticals and guaranteed secondary effects apply (e.g. Draco Meteor's Sp. Atk drop).
- Multi-hit moves use a fixed count: 3 for 2-5 hit moves (the expected value), and the maximum for moves that roll accuracy per hit (Triple Axel, Population Bomb), since hits always land here.
- Counter, Mirror Coat and Metal Burst are excluded: they depend too much on the opponent's move type and power.
- "KO in n" is guaranteed even at the lowest roll; "n hits (p%)" is the chance at higher rolls.
- Factors that actually affected each number (weather, terrain, Intimidate, survival abilities, healing) are shown in the cells.
| Build 1 | Build 2 | Build 3 | |
|---|---|---|---|
| ↓ | 29.9〜35.9% Earthquake 4HKO | 29.9〜35.9% Earthquake 4HKO | 29.9〜35.9% Earthquake 3 hits (27%) |
| ↓ | 41.8〜49.7% Sacred Sword 3HKO | 76.3〜89.8% Shadow Ball 2HKO | 62.7〜73.4% Shadow Ball 2HKO |
| Speed | First S84 / S80 | First S84 / S72 | First S84 / S80 |
| Verdict | ▲ Loss: 4HKO to KO / 3HKO to be KOed, moves first | × Loss: 4HKO to KO / 2HKO to be KOed, moves first | × Loss: 4HKO to KO / 2HKO to be KOed, moves first |
Orthworm's build: Leftovers, Impish, H32 B25 S9
Hits-to-KO, Speed, and win/loss for each side's best move against 3 known Aegislash build(s).
Assumptions
- Switching, status moves and the opponent's counterattack are not included.
- Moves are treated as always hitting (accuracy is ignored).
- Only guaranteed criticals and guaranteed secondary effects apply (e.g. Draco Meteor's Sp. Atk drop).
- Multi-hit moves use a fixed count: 3 for 2-5 hit moves (the expected value), and the maximum for moves that roll accuracy per hit (Triple Axel, Population Bomb), since hits always land here.
- Counter, Mirror Coat and Metal Burst are excluded: they depend too much on the opponent's move type and power.
- "KO in n" is guaranteed even at the lowest roll; "n hits (p%)" is the chance at higher rolls.
- Factors that actually affected each number (weather, terrain, Intimidate, survival abilities, healing) are shown in the cells.
| Build 1 | Build 2 | Build 3 | |
|---|---|---|---|
| ↓ | 29.9〜35.9% Earthquake 4HKO | 29.9〜35.9% Earthquake 4HKO | 29.9〜35.9% Earthquake 3 hits (27%) |
| ↓ | 55.4〜65.5% Close Combat 2HKO | 76.3〜89.8% Shadow Ball 2HKO | 62.7〜73.4% Shadow Ball 2HKO |
| Speed | First S94 / S80 | First S94 / S72 | First S94 / S80 |
| Verdict | × Loss: 4HKO to KO / 2HKO to be KOed, moves first | × Loss: 4HKO to KO / 2HKO to be KOed, moves first | × Loss: 4HKO to KO / 2HKO to be KOed, moves first |
Orthworm's build: Mental Herb, Impish, H32 B25 S9
Hits-to-KO, Speed, and win/loss for each side's best move against 3 known Aegislash build(s).
Assumptions
- Switching, status moves and the opponent's counterattack are not included.
- Moves are treated as always hitting (accuracy is ignored).
- Only guaranteed criticals and guaranteed secondary effects apply (e.g. Draco Meteor's Sp. Atk drop).
- Multi-hit moves use a fixed count: 3 for 2-5 hit moves (the expected value), and the maximum for moves that roll accuracy per hit (Triple Axel, Population Bomb), since hits always land here.
- Counter, Mirror Coat and Metal Burst are excluded: they depend too much on the opponent's move type and power.
- "KO in n" is guaranteed even at the lowest roll; "n hits (p%)" is the chance at higher rolls.
- Factors that actually affected each number (weather, terrain, Intimidate, survival abilities, healing) are shown in the cells.
| Build 1 | Build 2 | Build 3 | |
|---|---|---|---|
| ↓ | 29.9〜35.9% Earthquake 4HKO | 29.9〜35.9% Earthquake 4HKO | 29.9〜35.9% Earthquake 3 hits (27%) |
| ↓ | 55.4〜65.5% Close Combat 2HKO | 76.3〜89.8% Shadow Ball 2HKO | 62.7〜73.4% Shadow Ball 2HKO |
| Speed | First S94 / S80 | First S94 / S72 | First S94 / S80 |
| Verdict | × Loss: 4HKO to KO / 2HKO to be KOed, moves first | × Loss: 4HKO to KO / 2HKO to be KOed, moves first | × Loss: 4HKO to KO / 2HKO to be KOed, moves first |
 ×*ゴリランダー
Orthworm vs ゴリランダー Orthworm's build: Sitrus Berry, Relaxed, H32 B25 S9
Hits-to-KO, Speed, and win/loss for each side's best move against 3 known ゴリランダー build(s).
Assumptions
- Switching, status moves and the opponent's counterattack are not included.
- Moves are treated as always hitting (accuracy is ignored).
- Only guaranteed criticals and guaranteed secondary effects apply (e.g. Draco Meteor's Sp. Atk drop).
- Multi-hit moves use a fixed count: 3 for 2-5 hit moves (the expected value), and the maximum for moves that roll accuracy per hit (Triple Axel, Population Bomb), since hits always land here.
- Counter, Mirror Coat and Metal Burst are excluded: they depend too much on the opponent's move type and power.
- "KO in n" is guaranteed even at the lowest roll; "n hits (p%)" is the chance at higher rolls.
- Factors that actually affected each number (weather, terrain, Intimidate, survival abilities, healing) are shown in the cells.
| Build 1 | Build 2 | Build 3 | |
|---|---|---|---|
| ↓ | 27.5〜32.9% Body Press 4HKOcalculated with グラスフィールド | 27.5〜32.9% Body Press 4HKOcalculated with グラスフィールド | 18.8〜22.2% Body Press 999HKOcalculated with グラスフィールド |
| ↓ | 30.5〜35.6% Wood Hammer 4 hits (98%) (incl. オボンのみ)calculated with グラスフィールド | 28.2〜32.8% Wood Hammer 4 hits (17%)calculated with グラスフィールド | 23.7〜27.7% Wood Hammer 999HKOcalculated with グラスフィールド |
| Speed | Second S84 / S107 | Second S84 / S107 | Second S84 / S107 |
| Verdict | ▲ Loss: 4HKO to KO / 4HKO to be KOed, moves second | ▲ Loss: 4HKO to KO / 4HKO to be KOed, moves second | × Loss: n/a to KO / 5HKO to be KOed, moves second |
Orthworm's build: Leftovers, Impish, H32 B25 S9
Hits-to-KO, Speed, and win/loss for each side's best move against 3 known ゴリランダー build(s).
Assumptions
- Switching, status moves and the opponent's counterattack are not included.
- Moves are treated as always hitting (accuracy is ignored).
- Only guaranteed criticals and guaranteed secondary effects apply (e.g. Draco Meteor's Sp. Atk drop).
- Multi-hit moves use a fixed count: 3 for 2-5 hit moves (the expected value), and the maximum for moves that roll accuracy per hit (Triple Axel, Population Bomb), since hits always land here.
- Counter, Mirror Coat and Metal Burst are excluded: they depend too much on the opponent's move type and power.
- "KO in n" is guaranteed even at the lowest roll; "n hits (p%)" is the chance at higher rolls.
- Factors that actually affected each number (weather, terrain, Intimidate, survival abilities, healing) are shown in the cells.
| Build 1 | Build 2 | Build 3 | |
|---|---|---|---|
| ↓ | 27.5〜32.9% Body Press 4HKOcalculated with グラスフィールド | 27.5〜32.9% Body Press 4HKOcalculated with グラスフィールド | 18.8〜22.2% Body Press 999HKOcalculated with グラスフィールド |
| ↓ | 30.5〜35.6% Wood Hammer 4HKOcalculated with グラスフィールド | 28.2〜32.8% Wood Hammer 4 hits (85%)calculated with グラスフィールド | 19.2〜23.2% Knock Off 999HKOcalculated with グラスフィールド |
| Speed | Second S94 / S107 | Second S94 / S107 | Second S94 / S107 |
| Verdict | ▲ Loss: 4HKO to KO / 4HKO to be KOed, moves second | ○ Win: 4HKO to KO / 5HKO to be KOed, moves second | × Loss: n/a to KO / 5HKO to be KOed, moves second |
Orthworm's build: Mental Herb, Impish, H32 B25 S9
Hits-to-KO, Speed, and win/loss for each side's best move against 3 known ゴリランダー build(s).
Assumptions
- Switching, status moves and the opponent's counterattack are not included.
- Moves are treated as always hitting (accuracy is ignored).
- Only guaranteed criticals and guaranteed secondary effects apply (e.g. Draco Meteor's Sp. Atk drop).
- Multi-hit moves use a fixed count: 3 for 2-5 hit moves (the expected value), and the maximum for moves that roll accuracy per hit (Triple Axel, Population Bomb), since hits always land here.
- Counter, Mirror Coat and Metal Burst are excluded: they depend too much on the opponent's move type and power.
- "KO in n" is guaranteed even at the lowest roll; "n hits (p%)" is the chance at higher rolls.
- Factors that actually affected each number (weather, terrain, Intimidate, survival abilities, healing) are shown in the cells.
| Build 1 | Build 2 | Build 3 | |
|---|---|---|---|
| ↓ | 27.5〜32.9% Body Press 4HKOcalculated with グラスフィールド | 27.5〜32.9% Body Press 4HKOcalculated with グラスフィールド | 18.8〜22.2% Body Press 999HKOcalculated with グラスフィールド |
| ↓ | 30.5〜35.6% Wood Hammer 3 hits (36%)calculated with グラスフィールド | 28.2〜32.8% Wood Hammer 4HKOcalculated with グラスフィールド | 23.7〜27.7% Wood Hammer 4 hits (82%)calculated with グラスフィールド |
| Speed | Second S94 / S107 | Second S94 / S107 | Second S94 / S107 |
| Verdict | ▲ Loss: 4HKO to KO / 4HKO to be KOed, moves second | ▲ Loss: 4HKO to KO / 4HKO to be KOed, moves second | × Loss: n/a to KO / 5HKO to be KOed, moves second |
 ×*Gyarados
Orthworm vs Gyarados Orthworm's build: Sitrus Berry, Relaxed, H32 B25 S9
Hits-to-KO, Speed, and win/loss for each side's best move against 3 known Gyarados build(s).
Assumptions
- Switching, status moves and the opponent's counterattack are not included.
- Moves are treated as always hitting (accuracy is ignored).
- Only guaranteed criticals and guaranteed secondary effects apply (e.g. Draco Meteor's Sp. Atk drop).
- Multi-hit moves use a fixed count: 3 for 2-5 hit moves (the expected value), and the maximum for moves that roll accuracy per hit (Triple Axel, Population Bomb), since hits always land here.
- Counter, Mirror Coat and Metal Burst are excluded: they depend too much on the opponent's move type and power.
- "KO in n" is guaranteed even at the lowest roll; "n hits (p%)" is the chance at higher rolls.
- Factors that actually affected each number (weather, terrain, Intimidate, survival abilities, healing) are shown in the cells.
| Build 1 | Build 2 | Build 3 | |
|---|---|---|---|
| ↓ | 10.9〜12.9% Body Press 999HKOcalculated with 攻撃-1 | 19.9〜23.4% Rock Tomb 999HKOcalculated with 攻撃-1 | 10.9〜12.9% Body Press 999HKOcalculated with 攻撃-1 |
| ↓ | 23.7〜28.2% Lash Out 999HKO | 30.5〜36.2% Lash Out 4 hits (98%) (incl. オボンのみ) | 23.7〜28.2% Lash Out 999HKO |
| Speed | Second S84 / S101 | Second S84 / S133 | Second S84 / S101 |
| Verdict | ▲ Loss: n/a to KO / n/a to be KOed, moves second | × Loss: n/a to KO / 5HKO to be KOed, moves second | ▲ Loss: n/a to KO / n/a to be KOed, moves second |
Orthworm's build: Leftovers, Impish, H32 B25 S9
Hits-to-KO, Speed, and win/loss for each side's best move against 3 known Gyarados build(s).
Assumptions
- Switching, status moves and the opponent's counterattack are not included.
- Moves are treated as always hitting (accuracy is ignored).
- Only guaranteed criticals and guaranteed secondary effects apply (e.g. Draco Meteor's Sp. Atk drop).
- Multi-hit moves use a fixed count: 3 for 2-5 hit moves (the expected value), and the maximum for moves that roll accuracy per hit (Triple Axel, Population Bomb), since hits always land here.
- Counter, Mirror Coat and Metal Burst are excluded: they depend too much on the opponent's move type and power.
- "KO in n" is guaranteed even at the lowest roll; "n hits (p%)" is the chance at higher rolls.
- Factors that actually affected each number (weather, terrain, Intimidate, survival abilities, healing) are shown in the cells.
| Build 1 | Build 2 | Build 3 | |
|---|---|---|---|
| ↓ | 10.9〜12.9% Body Press 999HKOcalculated with 攻撃-1 | 19.9〜23.4% Rock Tomb 999HKOcalculated with 攻撃-1 | 10.9〜12.9% Body Press 999HKOcalculated with 攻撃-1 |
| ↓ | 23.7〜28.2% Lash Out 999HKO | 30.5〜36.2% Lash Out 4HKO | 23.7〜28.2% Lash Out 999HKO |
| Speed | Second S94 / S101 | Second S94 / S133 | Second S94 / S101 |
| Verdict | ▲ Loss: n/a to KO / n/a to be KOed, moves second | × Loss: n/a to KO / 4HKO to be KOed, moves second | ▲ Loss: n/a to KO / n/a to be KOed, moves second |
Orthworm's build: Mental Herb, Impish, H32 B25 S9
Hits-to-KO, Speed, and win/loss for each side's best move against 3 known Gyarados build(s).
Assumptions
- Switching, status moves and the opponent's counterattack are not included.
- Moves are treated as always hitting (accuracy is ignored).
- Only guaranteed criticals and guaranteed secondary effects apply (e.g. Draco Meteor's Sp. Atk drop).
- Multi-hit moves use a fixed count: 3 for 2-5 hit moves (the expected value), and the maximum for moves that roll accuracy per hit (Triple Axel, Population Bomb), since hits always land here.
- Counter, Mirror Coat and Metal Burst are excluded: they depend too much on the opponent's move type and power.
- "KO in n" is guaranteed even at the lowest roll; "n hits (p%)" is the chance at higher rolls.
- Factors that actually affected each number (weather, terrain, Intimidate, survival abilities, healing) are shown in the cells.
| Build 1 | Build 2 | Build 3 | |
|---|---|---|---|
| ↓ | 10.9〜12.9% Body Press 999HKOcalculated with 攻撃-1 | 19.9〜23.4% Rock Tomb 999HKOcalculated with 攻撃-1 | 10.9〜12.9% Body Press 999HKOcalculated with 攻撃-1 |
| ↓ | 23.7〜28.2% Lash Out 4 hits (85%) | 30.5〜36.2% Lash Out 3 hits (37%) | 23.7〜28.2% Lash Out 4 hits (85%) |
| Speed | Second S94 / S101 | Second S94 / S133 | Second S94 / S101 |
| Verdict | × Loss: n/a to KO / 5HKO to be KOed, moves second | × Loss: n/a to KO / 4HKO to be KOed, moves second | × Loss: n/a to KO / 5HKO to be KOed, moves second |
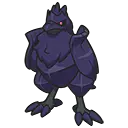 ×Corviknight
Orthworm vs Corviknight Orthworm's build: Sitrus Berry, Relaxed, H32 B25 S9
Hits-to-KO, Speed, and win/loss for each side's best move against 3 known Corviknight build(s).
Assumptions
- Switching, status moves and the opponent's counterattack are not included.
- Moves are treated as always hitting (accuracy is ignored).
- Only guaranteed criticals and guaranteed secondary effects apply (e.g. Draco Meteor's Sp. Atk drop).
- Multi-hit moves use a fixed count: 3 for 2-5 hit moves (the expected value), and the maximum for moves that roll accuracy per hit (Triple Axel, Population Bomb), since hits always land here.
- Counter, Mirror Coat and Metal Burst are excluded: they depend too much on the opponent's move type and power.
- "KO in n" is guaranteed even at the lowest roll; "n hits (p%)" is the chance at higher rolls.
- Factors that actually affected each number (weather, terrain, Intimidate, survival abilities, healing) are shown in the cells.
| Build 1 | Build 2 | Build 3 | |
|---|---|---|---|
| ↓ | 18.0〜21.5% Body Press 999HKO | 18.0〜21.5% Body Press 999HKO | 18.0〜21.5% Body Press 999HKO |
| ↓ | 28.2〜33.9% Body Press 4 hits (33%) (incl. オボンのみ) | 28.2〜33.9% Body Press 4 hits (33%) (incl. オボンのみ) | 28.2〜33.9% Body Press 4 hits (33%) (incl. オボンのみ) |
| Speed | Second S84 / S87 | First S84 / S78 | First S84 / S78 |
| Verdict | × Loss: n/a to KO / 5HKO to be KOed, moves second | × Loss: n/a to KO / 5HKO to be KOed, moves first | × Loss: n/a to KO / 5HKO to be KOed, moves first |
Orthworm's build: Leftovers, Impish, H32 B25 S9
Hits-to-KO, Speed, and win/loss for each side's best move against 3 known Corviknight build(s).
Assumptions
- Switching, status moves and the opponent's counterattack are not included.
- Moves are treated as always hitting (accuracy is ignored).
- Only guaranteed criticals and guaranteed secondary effects apply (e.g. Draco Meteor's Sp. Atk drop).
- Multi-hit moves use a fixed count: 3 for 2-5 hit moves (the expected value), and the maximum for moves that roll accuracy per hit (Triple Axel, Population Bomb), since hits always land here.
- Counter, Mirror Coat and Metal Burst are excluded: they depend too much on the opponent's move type and power.
- "KO in n" is guaranteed even at the lowest roll; "n hits (p%)" is the chance at higher rolls.
- Factors that actually affected each number (weather, terrain, Intimidate, survival abilities, healing) are shown in the cells.
| Build 1 | Build 2 | Build 3 | |
|---|---|---|---|
| ↓ | 18.0〜21.5% Body Press 999HKO | 18.0〜21.5% Body Press 999HKO | 18.0〜21.5% Body Press 999HKO |
| ↓ | 28.2〜33.9% Body Press 4 hits (95%) (incl. たべのこし) | 28.2〜33.9% Body Press 4 hits (95%) (incl. たべのこし) | 28.2〜33.9% Body Press 4 hits (95%) (incl. たべのこし) |
| Speed | First S94 / S87 | First S94 / S78 | First S94 / S78 |
| Verdict | × Loss: n/a to KO / 5HKO to be KOed, moves first | × Loss: n/a to KO / 5HKO to be KOed, moves first | × Loss: n/a to KO / 5HKO to be KOed, moves first |
Orthworm's build: Mental Herb, Impish, H32 B25 S9
Hits-to-KO, Speed, and win/loss for each side's best move against 3 known Corviknight build(s).
Assumptions
- Switching, status moves and the opponent's counterattack are not included.
- Moves are treated as always hitting (accuracy is ignored).
- Only guaranteed criticals and guaranteed secondary effects apply (e.g. Draco Meteor's Sp. Atk drop).
- Multi-hit moves use a fixed count: 3 for 2-5 hit moves (the expected value), and the maximum for moves that roll accuracy per hit (Triple Axel, Population Bomb), since hits always land here.
- Counter, Mirror Coat and Metal Burst are excluded: they depend too much on the opponent's move type and power.
- "KO in n" is guaranteed even at the lowest roll; "n hits (p%)" is the chance at higher rolls.
- Factors that actually affected each number (weather, terrain, Intimidate, survival abilities, healing) are shown in the cells.
| Build 1 | Build 2 | Build 3 | |
|---|---|---|---|
| ↓ | 18.0〜21.5% Body Press 999HKO | 18.0〜21.5% Body Press 999HKO | 18.0〜21.5% Body Press 999HKO |
| ↓ | 28.2〜33.9% Body Press 3 hits (<1%) | 28.2〜33.9% Body Press 3 hits (<1%) | 28.2〜33.9% Body Press 3 hits (<1%) |
| Speed | First S94 / S87 | First S94 / S78 | First S94 / S78 |
| Verdict | × Loss: n/a to KO / 4HKO to be KOed, moves first | × Loss: n/a to KO / 4HKO to be KOed, moves first | × Loss: n/a to KO / 4HKO to be KOed, moves first |
 ▲*Basculegion-F
Orthworm vs Basculegion-F Orthworm's build: Sitrus Berry, Relaxed, H32 B25 S9
Hits-to-KO, Speed, and win/loss for each side's best move against 3 known Basculegion-F build(s).
Assumptions
- Switching, status moves and the opponent's counterattack are not included.
- Moves are treated as always hitting (accuracy is ignored).
- Only guaranteed criticals and guaranteed secondary effects apply (e.g. Draco Meteor's Sp. Atk drop).
- Multi-hit moves use a fixed count: 3 for 2-5 hit moves (the expected value), and the maximum for moves that roll accuracy per hit (Triple Axel, Population Bomb), since hits always land here.
- Counter, Mirror Coat and Metal Burst are excluded: they depend too much on the opponent's move type and power.
- "KO in n" is guaranteed even at the lowest roll; "n hits (p%)" is the chance at higher rolls.
- Factors that actually affected each number (weather, terrain, Intimidate, survival abilities, healing) are shown in the cells.
| Build 1 | Build 2 | Build 3 | |
|---|---|---|---|
| ↓ | 23.9〜28.4% Earthquake 4 hits (95%) | 23.9〜28.4% Earthquake 4 hits (95%) | 23.9〜28.4% Earthquake 4 hits (95%) |
| ↓ | 38.4〜46.3% Wave Crash 3 hits (69%) | 42.9〜51.4% Wave Crash 3HKO | 49.7〜59.9% Wave Crash 3HKO |
| Speed | Second S84 / S195 | Second S84 / S143 | Second S84 / S130 |
| Verdict | ▲ Loss: 5HKO to KO / 4HKO to be KOed, moves second | × Loss: 5HKO to KO / 3HKO to be KOed, moves second | × Loss: 5HKO to KO / 3HKO to be KOed, moves second |
Orthworm's build: Leftovers, Impish, H32 B25 S9
Hits-to-KO, Speed, and win/loss for each side's best move against 3 known Basculegion-F build(s).
Assumptions
- Switching, status moves and the opponent's counterattack are not included.
- Moves are treated as always hitting (accuracy is ignored).
- Only guaranteed criticals and guaranteed secondary effects apply (e.g. Draco Meteor's Sp. Atk drop).
- Multi-hit moves use a fixed count: 3 for 2-5 hit moves (the expected value), and the maximum for moves that roll accuracy per hit (Triple Axel, Population Bomb), since hits always land here.
- Counter, Mirror Coat and Metal Burst are excluded: they depend too much on the opponent's move type and power.
- "KO in n" is guaranteed even at the lowest roll; "n hits (p%)" is the chance at higher rolls.
- Factors that actually affected each number (weather, terrain, Intimidate, survival abilities, healing) are shown in the cells.
| Build 1 | Build 2 | Build 3 | |
|---|---|---|---|
| ↓ | 23.9〜28.4% Earthquake 4 hits (95%) | 23.9〜28.4% Earthquake 4 hits (95%) | 23.9〜28.4% Earthquake 4 hits (95%) |
| ↓ | 38.4〜46.3% Wave Crash 3HKO | 42.9〜51.4% Wave Crash 3HKO | 49.7〜59.9% Wave Crash 2 hits (79%) |
| Speed | Second S94 / S195 | Second S94 / S143 | Second S94 / S130 |
| Verdict | × Loss: 5HKO to KO / 3HKO to be KOed, moves second | × Loss: 5HKO to KO / 3HKO to be KOed, moves second | × Loss: 5HKO to KO / 3HKO to be KOed, moves second |
Orthworm's build: Mental Herb, Impish, H32 B25 S9
Hits-to-KO, Speed, and win/loss for each side's best move against 3 known Basculegion-F build(s).
Assumptions
- Switching, status moves and the opponent's counterattack are not included.
- Moves are treated as always hitting (accuracy is ignored).
- Only guaranteed criticals and guaranteed secondary effects apply (e.g. Draco Meteor's Sp. Atk drop).
- Multi-hit moves use a fixed count: 3 for 2-5 hit moves (the expected value), and the maximum for moves that roll accuracy per hit (Triple Axel, Population Bomb), since hits always land here.
- Counter, Mirror Coat and Metal Burst are excluded: they depend too much on the opponent's move type and power.
- "KO in n" is guaranteed even at the lowest roll; "n hits (p%)" is the chance at higher rolls.
- Factors that actually affected each number (weather, terrain, Intimidate, survival abilities, healing) are shown in the cells.
| Build 1 | Build 2 | Build 3 | |
|---|---|---|---|
| ↓ | 23.9〜28.4% Earthquake 4 hits (95%) | 23.9〜28.4% Earthquake 4 hits (95%) | 23.9〜28.4% Earthquake 4 hits (95%) |
| ↓ | 38.4〜46.3% Wave Crash 3HKO | 42.9〜51.4% Wave Crash 2 hits (4%) | 49.7〜59.9% Wave Crash 2 hits (>99%) |
| Speed | Second S94 / S195 | Second S94 / S143 | Second S94 / S130 |
| Verdict | × Loss: 5HKO to KO / 3HKO to be KOed, moves second | × Loss: 5HKO to KO / 3HKO to be KOed, moves second | × Loss: 5HKO to KO / 3HKO to be KOed, moves second |
 ▲Greninja
Orthworm vs Greninja Orthworm's build: Sitrus Berry, Relaxed, H32 B25 S9
Hits-to-KO, Speed, and win/loss for each side's best move against 3 known Greninja build(s).
Assumptions
- Switching, status moves and the opponent's counterattack are not included.
- Moves are treated as always hitting (accuracy is ignored).
- Only guaranteed criticals and guaranteed secondary effects apply (e.g. Draco Meteor's Sp. Atk drop).
- Multi-hit moves use a fixed count: 3 for 2-5 hit moves (the expected value), and the maximum for moves that roll accuracy per hit (Triple Axel, Population Bomb), since hits always land here.
- Counter, Mirror Coat and Metal Burst are excluded: they depend too much on the opponent's move type and power.
- "KO in n" is guaranteed even at the lowest roll; "n hits (p%)" is the chance at higher rolls.
- Factors that actually affected each number (weather, terrain, Intimidate, survival abilities, healing) are shown in the cells.
| Build 1 | Build 2 | Build 3 | |
|---|---|---|---|
| ↓ | 98.0〜115.4% Body Press 2HKO | 87.2〜103.4% Body Press 1 hits (19%) | 98.0〜115.4% Body Press 1 hits (81%) |
| ↓ | 79.7〜93.8% Hydro Pump 2HKO | 86.4〜102.3% Hydro Pump 1 hits (19%) | 79.7〜93.8% Hydro Pump 2HKO |
| Speed | Second S84 / S174 | Second S84 / S213 | Second S84 / S261 |
| Verdict | ▲ Loss: 2HKO to KO / 2HKO to be KOed, moves second | ▲ Loss: 2HKO to KO / 2HKO to be KOed, moves second | ▲ Loss: 2HKO to KO / 2HKO to be KOed, moves second |
Orthworm's build: Leftovers, Impish, H32 B25 S9
Hits-to-KO, Speed, and win/loss for each side's best move against 3 known Greninja build(s).
Assumptions
- Switching, status moves and the opponent's counterattack are not included.
- Moves are treated as always hitting (accuracy is ignored).
- Only guaranteed criticals and guaranteed secondary effects apply (e.g. Draco Meteor's Sp. Atk drop).
- Multi-hit moves use a fixed count: 3 for 2-5 hit moves (the expected value), and the maximum for moves that roll accuracy per hit (Triple Axel, Population Bomb), since hits always land here.
- Counter, Mirror Coat and Metal Burst are excluded: they depend too much on the opponent's move type and power.
- "KO in n" is guaranteed even at the lowest roll; "n hits (p%)" is the chance at higher rolls.
- Factors that actually affected each number (weather, terrain, Intimidate, survival abilities, healing) are shown in the cells.
| Build 1 | Build 2 | Build 3 | |
|---|---|---|---|
| ↓ | 98.0〜115.4% Body Press 2HKO | 87.2〜103.4% Body Press 1 hits (19%) | 98.0〜115.4% Body Press 1 hits (81%) |
| ↓ | 79.7〜93.8% Hydro Pump 2HKO | 86.4〜102.3% Hydro Pump 1 hits (19%) | 79.7〜93.8% Hydro Pump 2HKO |
| Speed | Second S94 / S174 | Second S94 / S213 | Second S94 / S261 |
| Verdict | ▲ Loss: 2HKO to KO / 2HKO to be KOed, moves second | ▲ Loss: 2HKO to KO / 2HKO to be KOed, moves second | ▲ Loss: 2HKO to KO / 2HKO to be KOed, moves second |
Orthworm's build: Mental Herb, Impish, H32 B25 S9
Hits-to-KO, Speed, and win/loss for each side's best move against 3 known Greninja build(s).
Assumptions
- Switching, status moves and the opponent's counterattack are not included.
- Moves are treated as always hitting (accuracy is ignored).
- Only guaranteed criticals and guaranteed secondary effects apply (e.g. Draco Meteor's Sp. Atk drop).
- Multi-hit moves use a fixed count: 3 for 2-5 hit moves (the expected value), and the maximum for moves that roll accuracy per hit (Triple Axel, Population Bomb), since hits always land here.
- Counter, Mirror Coat and Metal Burst are excluded: they depend too much on the opponent's move type and power.
- "KO in n" is guaranteed even at the lowest roll; "n hits (p%)" is the chance at higher rolls.
- Factors that actually affected each number (weather, terrain, Intimidate, survival abilities, healing) are shown in the cells.
| Build 1 | Build 2 | Build 3 | |
|---|---|---|---|
| ↓ | 98.0〜115.4% Body Press 2HKO | 87.2〜103.4% Body Press 1 hits (19%) | 98.0〜115.4% Body Press 1 hits (81%) |
| ↓ | 79.7〜93.8% Hydro Pump 2HKO | 86.4〜102.3% Hydro Pump 1 hits (19%) | 79.7〜93.8% Hydro Pump 2HKO |
| Speed | Second S94 / S174 | Second S94 / S213 | Second S94 / S261 |
| Verdict | ▲ Loss: 2HKO to KO / 2HKO to be KOed, moves second | ▲ Loss: 2HKO to KO / 2HKO to be KOed, moves second | ▲ Loss: 2HKO to KO / 2HKO to be KOed, moves second |
 ×メガリザードンX
Orthworm vs メガリザードンX Orthworm's build: Sitrus Berry, Relaxed, H32 B25 S9
Hits-to-KO, Speed, and win/loss for each side's best move against 1 known メガリザードンX build(s).
Assumptions
- Switching, status moves and the opponent's counterattack are not included.
- Moves are treated as always hitting (accuracy is ignored).
- Only guaranteed criticals and guaranteed secondary effects apply (e.g. Draco Meteor's Sp. Atk drop).
- Multi-hit moves use a fixed count: 3 for 2-5 hit moves (the expected value), and the maximum for moves that roll accuracy per hit (Triple Axel, Population Bomb), since hits always land here.
- Counter, Mirror Coat and Metal Burst are excluded: they depend too much on the opponent's move type and power.
- "KO in n" is guaranteed even at the lowest roll; "n hits (p%)" is the chance at higher rolls.
- Factors that actually affected each number (weather, terrain, Intimidate, survival abilities, healing) are shown in the cells.
| Build 1 | |
|---|---|
| ↓ | 40.0〜47.7% Earthquake 3HKO |
| ↓ | 105.1〜123.2% Flamethrower 1HKO |
| Speed | Second S84 / S167 |
| Verdict | × Loss: 3HKO to KO / 1HKO to be KOed, moves second |
Orthworm's build: Leftovers, Impish, H32 B25 S9
Hits-to-KO, Speed, and win/loss for each side's best move against 1 known メガリザードンX build(s).
Assumptions
- Switching, status moves and the opponent's counterattack are not included.
- Moves are treated as always hitting (accuracy is ignored).
- Only guaranteed criticals and guaranteed secondary effects apply (e.g. Draco Meteor's Sp. Atk drop).
- Multi-hit moves use a fixed count: 3 for 2-5 hit moves (the expected value), and the maximum for moves that roll accuracy per hit (Triple Axel, Population Bomb), since hits always land here.
- Counter, Mirror Coat and Metal Burst are excluded: they depend too much on the opponent's move type and power.
- "KO in n" is guaranteed even at the lowest roll; "n hits (p%)" is the chance at higher rolls.
- Factors that actually affected each number (weather, terrain, Intimidate, survival abilities, healing) are shown in the cells.
| Build 1 | |
|---|---|
| ↓ | 40.0〜47.7% Earthquake 3HKO |
| ↓ | 105.1〜123.2% Flamethrower 1HKO |
| Speed | Second S94 / S167 |
| Verdict | × Loss: 3HKO to KO / 1HKO to be KOed, moves second |
Orthworm's build: Mental Herb, Impish, H32 B25 S9
Hits-to-KO, Speed, and win/loss for each side's best move against 1 known メガリザードンX build(s).
Assumptions
- Switching, status moves and the opponent's counterattack are not included.
- Moves are treated as always hitting (accuracy is ignored).
- Only guaranteed criticals and guaranteed secondary effects apply (e.g. Draco Meteor's Sp. Atk drop).
- Multi-hit moves use a fixed count: 3 for 2-5 hit moves (the expected value), and the maximum for moves that roll accuracy per hit (Triple Axel, Population Bomb), since hits always land here.
- Counter, Mirror Coat and Metal Burst are excluded: they depend too much on the opponent's move type and power.
- "KO in n" is guaranteed even at the lowest roll; "n hits (p%)" is the chance at higher rolls.
- Factors that actually affected each number (weather, terrain, Intimidate, survival abilities, healing) are shown in the cells.
| Build 1 | |
|---|---|
| ↓ | 40.0〜47.7% Earthquake 3HKO |
| ↓ | 105.1〜123.2% Flamethrower 1HKO |
| Speed | Second S94 / S167 |
| Verdict | × Loss: 3HKO to KO / 1HKO to be KOed, moves second |
×メガリザードンY
Orthworm vs メガリザードンY Orthworm's build: Sitrus Berry, Relaxed, H32 B25 S9
Hits-to-KO, Speed, and win/loss for each side's best move against 1 known メガリザードンY build(s).
Assumptions
- Switching, status moves and the opponent's counterattack are not included.
- Moves are treated as always hitting (accuracy is ignored).
- Only guaranteed criticals and guaranteed secondary effects apply (e.g. Draco Meteor's Sp. Atk drop).
- Multi-hit moves use a fixed count: 3 for 2-5 hit moves (the expected value), and the maximum for moves that roll accuracy per hit (Triple Axel, Population Bomb), since hits always land here.
- Counter, Mirror Coat and Metal Burst are excluded: they depend too much on the opponent's move type and power.
- "KO in n" is guaranteed even at the lowest roll; "n hits (p%)" is the chance at higher rolls.
- Factors that actually affected each number (weather, terrain, Intimidate, survival abilities, healing) are shown in the cells.
| Build 1 | |
|---|---|
| ↓ | 64.5〜77.4% Rock Tomb 2HKOcalculated with 晴れ |
| ↓ | 267.8〜315.3% Flamethrower 1HKOcalculated with 晴れ |
| Speed | Second S84 / S152 |
| Verdict | × Loss: 2HKO to KO / 1HKO to be KOed, moves second |
Orthworm's build: Leftovers, Impish, H32 B25 S9
Hits-to-KO, Speed, and win/loss for each side's best move against 1 known メガリザードンY build(s).
Assumptions
- Switching, status moves and the opponent's counterattack are not included.
- Moves are treated as always hitting (accuracy is ignored).
- Only guaranteed criticals and guaranteed secondary effects apply (e.g. Draco Meteor's Sp. Atk drop).
- Multi-hit moves use a fixed count: 3 for 2-5 hit moves (the expected value), and the maximum for moves that roll accuracy per hit (Triple Axel, Population Bomb), since hits always land here.
- Counter, Mirror Coat and Metal Burst are excluded: they depend too much on the opponent's move type and power.
- "KO in n" is guaranteed even at the lowest roll; "n hits (p%)" is the chance at higher rolls.
- Factors that actually affected each number (weather, terrain, Intimidate, survival abilities, healing) are shown in the cells.
| Build 1 | |
|---|---|
| ↓ | 64.5〜77.4% Rock Tomb 2HKOcalculated with 晴れ |
| ↓ | 267.8〜315.3% Flamethrower 1HKOcalculated with 晴れ |
| Speed | Second S94 / S152 |
| Verdict | × Loss: 2HKO to KO / 1HKO to be KOed, moves second |
Orthworm's build: Mental Herb, Impish, H32 B25 S9
Hits-to-KO, Speed, and win/loss for each side's best move against 1 known メガリザードンY build(s).
Assumptions
- Switching, status moves and the opponent's counterattack are not included.
- Moves are treated as always hitting (accuracy is ignored).
- Only guaranteed criticals and guaranteed secondary effects apply (e.g. Draco Meteor's Sp. Atk drop).
- Multi-hit moves use a fixed count: 3 for 2-5 hit moves (the expected value), and the maximum for moves that roll accuracy per hit (Triple Axel, Population Bomb), since hits always land here.
- Counter, Mirror Coat and Metal Burst are excluded: they depend too much on the opponent's move type and power.
- "KO in n" is guaranteed even at the lowest roll; "n hits (p%)" is the chance at higher rolls.
- Factors that actually affected each number (weather, terrain, Intimidate, survival abilities, healing) are shown in the cells.
| Build 1 | |
|---|---|
| ↓ | 64.5〜77.4% Rock Tomb 2HKOcalculated with 晴れ |
| ↓ | 267.8〜315.3% Flamethrower 1HKOcalculated with 晴れ |
| Speed | Second S94 / S152 |
| Verdict | × Loss: 2HKO to KO / 1HKO to be KOed, moves second |
 ▲エースバーン
Orthworm vs エースバーン Orthworm's build: Sitrus Berry, Relaxed, H32 B25 S9
Hits-to-KO, Speed, and win/loss for each side's best move against 3 known エースバーン build(s).
Assumptions
- Switching, status moves and the opponent's counterattack are not included.
- Moves are treated as always hitting (accuracy is ignored).
- Only guaranteed criticals and guaranteed secondary effects apply (e.g. Draco Meteor's Sp. Atk drop).
- Multi-hit moves use a fixed count: 3 for 2-5 hit moves (the expected value), and the maximum for moves that roll accuracy per hit (Triple Axel, Population Bomb), since hits always land here.
- Counter, Mirror Coat and Metal Burst are excluded: they depend too much on the opponent's move type and power.
- "KO in n" is guaranteed even at the lowest roll; "n hits (p%)" is the chance at higher rolls.
- Factors that actually affected each number (weather, terrain, Intimidate, survival abilities, healing) are shown in the cells.
| Build 1 | Build 2 | Build 3 | |
|---|---|---|---|
| ↓ | 53.5〜63.7% Earthquake 2HKO | 53.5〜63.7% Earthquake 2HKO | 53.5〜63.7% Earthquake 2HKO |
| ↓ | 74.6〜88.1% High Jump Kick 2HKO | 65.5〜79.1% High Jump Kick 2HKO | 96.6〜114.1% High Jump Kick 1 hits (75%) |
| Speed | Second S84 / S256 | Second S84 / S188 | Second S84 / S171 |
| Verdict | ▲ Loss: 2HKO to KO / 2HKO to be KOed, moves second | ▲ Loss: 2HKO to KO / 2HKO to be KOed, moves second | ▲ Loss: 2HKO to KO / 2HKO to be KOed, moves second |
Orthworm's build: Leftovers, Impish, H32 B25 S9
Hits-to-KO, Speed, and win/loss for each side's best move against 3 known エースバーン build(s).
Assumptions
- Switching, status moves and the opponent's counterattack are not included.
- Moves are treated as always hitting (accuracy is ignored).
- Only guaranteed criticals and guaranteed secondary effects apply (e.g. Draco Meteor's Sp. Atk drop).
- Multi-hit moves use a fixed count: 3 for 2-5 hit moves (the expected value), and the maximum for moves that roll accuracy per hit (Triple Axel, Population Bomb), since hits always land here.
- Counter, Mirror Coat and Metal Burst are excluded: they depend too much on the opponent's move type and power.
- "KO in n" is guaranteed even at the lowest roll; "n hits (p%)" is the chance at higher rolls.
- Factors that actually affected each number (weather, terrain, Intimidate, survival abilities, healing) are shown in the cells.
| Build 1 | Build 2 | Build 3 | |
|---|---|---|---|
| ↓ | 53.5〜63.7% Earthquake 2HKO | 53.5〜63.7% Earthquake 2HKO | 53.5〜63.7% Earthquake 2HKO |
| ↓ | 74.6〜88.1% High Jump Kick 2HKO | 65.5〜79.1% High Jump Kick 2HKO | 96.6〜114.1% High Jump Kick 1 hits (75%) |
| Speed | Second S94 / S256 | Second S94 / S188 | Second S94 / S171 |
| Verdict | ▲ Loss: 2HKO to KO / 2HKO to be KOed, moves second | ▲ Loss: 2HKO to KO / 2HKO to be KOed, moves second | ▲ Loss: 2HKO to KO / 2HKO to be KOed, moves second |
Orthworm's build: Mental Herb, Impish, H32 B25 S9
Hits-to-KO, Speed, and win/loss for each side's best move against 3 known エースバーン build(s).
Assumptions
- Switching, status moves and the opponent's counterattack are not included.
- Moves are treated as always hitting (accuracy is ignored).
- Only guaranteed criticals and guaranteed secondary effects apply (e.g. Draco Meteor's Sp. Atk drop).
- Multi-hit moves use a fixed count: 3 for 2-5 hit moves (the expected value), and the maximum for moves that roll accuracy per hit (Triple Axel, Population Bomb), since hits always land here.
- Counter, Mirror Coat and Metal Burst are excluded: they depend too much on the opponent's move type and power.
- "KO in n" is guaranteed even at the lowest roll; "n hits (p%)" is the chance at higher rolls.
- Factors that actually affected each number (weather, terrain, Intimidate, survival abilities, healing) are shown in the cells.
| Build 1 | Build 2 | Build 3 | |
|---|---|---|---|
| ↓ | 53.5〜63.7% Earthquake 2HKO | 53.5〜63.7% Earthquake 2HKO | 53.5〜63.7% Earthquake 2HKO |
| ↓ | 74.6〜88.1% High Jump Kick 2HKO | 65.5〜79.1% High Jump Kick 2HKO | 96.6〜114.1% High Jump Kick 1 hits (75%) |
| Speed | Second S94 / S256 | Second S94 / S188 | Second S94 / S171 |
| Verdict | ▲ Loss: 2HKO to KO / 2HKO to be KOed, moves second | ▲ Loss: 2HKO to KO / 2HKO to be KOed, moves second | ▲ Loss: 2HKO to KO / 2HKO to be KOed, moves second |
 ▲Sneasler
Orthworm vs Sneasler Orthworm's build: Sitrus Berry, Relaxed, H32 B25 S9
Hits-to-KO, Speed, and win/loss for each side's best move against 3 known Sneasler build(s).
Assumptions
- Switching, status moves and the opponent's counterattack are not included.
- Moves are treated as always hitting (accuracy is ignored).
- Only guaranteed criticals and guaranteed secondary effects apply (e.g. Draco Meteor's Sp. Atk drop).
- Multi-hit moves use a fixed count: 3 for 2-5 hit moves (the expected value), and the maximum for moves that roll accuracy per hit (Triple Axel, Population Bomb), since hits always land here.
- Counter, Mirror Coat and Metal Burst are excluded: they depend too much on the opponent's move type and power.
- "KO in n" is guaranteed even at the lowest roll; "n hits (p%)" is the chance at higher rolls.
- Factors that actually affected each number (weather, terrain, Intimidate, survival abilities, healing) are shown in the cells.
| Build 1 | Build 2 | Build 3 | |
|---|---|---|---|
| ↓ | 63.7〜75.2% Earthquake 2HKO | 63.7〜75.2% Earthquake 2HKO | 63.7〜75.2% Earthquake 2HKO |
| ↓ | 74.6〜88.1% Close Combat 2HKO | 74.6〜88.1% Close Combat 2HKO | 74.6〜88.1% Close Combat 2HKO |
| Speed | Second S84 / S172 | Second S84 / S172 | Second S84 / S172 |
| Verdict | ▲ Loss: 2HKO to KO / 2HKO to be KOed, moves second | ▲ Loss: 2HKO to KO / 2HKO to be KOed, moves second | ▲ Loss: 2HKO to KO / 2HKO to be KOed, moves second |
Orthworm's build: Leftovers, Impish, H32 B25 S9
Hits-to-KO, Speed, and win/loss for each side's best move against 3 known Sneasler build(s).
Assumptions
- Switching, status moves and the opponent's counterattack are not included.
- Moves are treated as always hitting (accuracy is ignored).
- Only guaranteed criticals and guaranteed secondary effects apply (e.g. Draco Meteor's Sp. Atk drop).
- Multi-hit moves use a fixed count: 3 for 2-5 hit moves (the expected value), and the maximum for moves that roll accuracy per hit (Triple Axel, Population Bomb), since hits always land here.
- Counter, Mirror Coat and Metal Burst are excluded: they depend too much on the opponent's move type and power.
- "KO in n" is guaranteed even at the lowest roll; "n hits (p%)" is the chance at higher rolls.
- Factors that actually affected each number (weather, terrain, Intimidate, survival abilities, healing) are shown in the cells.
| Build 1 | Build 2 | Build 3 | |
|---|---|---|---|
| ↓ | 63.7〜75.2% Earthquake 2HKO | 63.7〜75.2% Earthquake 2HKO | 63.7〜75.2% Earthquake 2HKO |
| ↓ | 74.6〜88.1% Close Combat 2HKO | 74.6〜88.1% Close Combat 2HKO | 74.6〜88.1% Close Combat 2HKO |
| Speed | Second S94 / S172 | Second S94 / S172 | Second S94 / S172 |
| Verdict | ▲ Loss: 2HKO to KO / 2HKO to be KOed, moves second | ▲ Loss: 2HKO to KO / 2HKO to be KOed, moves second | ▲ Loss: 2HKO to KO / 2HKO to be KOed, moves second |
Orthworm's build: Mental Herb, Impish, H32 B25 S9
Hits-to-KO, Speed, and win/loss for each side's best move against 3 known Sneasler build(s).
Assumptions
- Switching, status moves and the opponent's counterattack are not included.
- Moves are treated as always hitting (accuracy is ignored).
- Only guaranteed criticals and guaranteed secondary effects apply (e.g. Draco Meteor's Sp. Atk drop).
- Multi-hit moves use a fixed count: 3 for 2-5 hit moves (the expected value), and the maximum for moves that roll accuracy per hit (Triple Axel, Population Bomb), since hits always land here.
- Counter, Mirror Coat and Metal Burst are excluded: they depend too much on the opponent's move type and power.
- "KO in n" is guaranteed even at the lowest roll; "n hits (p%)" is the chance at higher rolls.
- Factors that actually affected each number (weather, terrain, Intimidate, survival abilities, healing) are shown in the cells.
| Build 1 | Build 2 | Build 3 | |
|---|---|---|---|
| ↓ | 63.7〜75.2% Earthquake 2HKO | 63.7〜75.2% Earthquake 2HKO | 63.7〜75.2% Earthquake 2HKO |
| ↓ | 74.6〜88.1% Close Combat 2HKO | 74.6〜88.1% Close Combat 2HKO | 74.6〜88.1% Close Combat 2HKO |
| Speed | Second S94 / S172 | Second S94 / S172 | Second S94 / S172 |
| Verdict | ▲ Loss: 2HKO to KO / 2HKO to be KOed, moves second | ▲ Loss: 2HKO to KO / 2HKO to be KOed, moves second | ▲ Loss: 2HKO to KO / 2HKO to be KOed, moves second |
 ×Rotom-W
Orthworm vs Rotom-W Orthworm's build: Sitrus Berry, Relaxed, H32 B25 S9
Hits-to-KO, Speed, and win/loss for each side's best move against 3 known Rotom-W build(s).
Assumptions
- Switching, status moves and the opponent's counterattack are not included.
- Moves are treated as always hitting (accuracy is ignored).
- Only guaranteed criticals and guaranteed secondary effects apply (e.g. Draco Meteor's Sp. Atk drop).
- Multi-hit moves use a fixed count: 3 for 2-5 hit moves (the expected value), and the maximum for moves that roll accuracy per hit (Triple Axel, Population Bomb), since hits always land here.
- Counter, Mirror Coat and Metal Burst are excluded: they depend too much on the opponent's move type and power.
- "KO in n" is guaranteed even at the lowest roll; "n hits (p%)" is the chance at higher rolls.
- Factors that actually affected each number (weather, terrain, Intimidate, survival abilities, healing) are shown in the cells.
| Build 1 | Build 2 | Build 3 | |
|---|---|---|---|
| ↓ | 23.6〜28.0% Body Press 999HKO | 23.6〜28.0% Body Press 999HKO | 39.4〜46.5% Body Press 3 hits (84%) |
| ↓ | 48.0〜57.6% Thunderbolt 3HKO | 48.0〜57.6% Thunderbolt 3HKO | 80.2〜94.9% Hydro Pump 2HKO |
| Speed | Second S84 / S106 | Second S84 / S106 | Second S84 / S138 |
| Verdict | × Loss: n/a to KO / 2HKO to be KOed, moves second | × Loss: n/a to KO / 2HKO to be KOed, moves second | × Loss: 4HKO to KO / 2HKO to be KOed, moves second |
Orthworm's build: Leftovers, Impish, H32 B25 S9
Hits-to-KO, Speed, and win/loss for each side's best move against 3 known Rotom-W build(s).
Assumptions
- Switching, status moves and the opponent's counterattack are not included.
- Moves are treated as always hitting (accuracy is ignored).
- Only guaranteed criticals and guaranteed secondary effects apply (e.g. Draco Meteor's Sp. Atk drop).
- Multi-hit moves use a fixed count: 3 for 2-5 hit moves (the expected value), and the maximum for moves that roll accuracy per hit (Triple Axel, Population Bomb), since hits always land here.
- Counter, Mirror Coat and Metal Burst are excluded: they depend too much on the opponent's move type and power.
- "KO in n" is guaranteed even at the lowest roll; "n hits (p%)" is the chance at higher rolls.
- Factors that actually affected each number (weather, terrain, Intimidate, survival abilities, healing) are shown in the cells.
| Build 1 | Build 2 | Build 3 | |
|---|---|---|---|
| ↓ | 23.6〜28.0% Body Press 999HKO | 23.6〜28.0% Body Press 999HKO | 39.4〜46.5% Body Press 3 hits (84%) |
| ↓ | 58.2〜69.5% Hydro Pump 2HKO | 58.2〜69.5% Hydro Pump 2HKO | 80.2〜94.9% Hydro Pump 2HKO |
| Speed | Second S94 / S106 | Second S94 / S106 | Second S94 / S138 |
| Verdict | × Loss: n/a to KO / 2HKO to be KOed, moves second | × Loss: n/a to KO / 2HKO to be KOed, moves second | × Loss: 4HKO to KO / 2HKO to be KOed, moves second |
Orthworm's build: Mental Herb, Impish, H32 B25 S9
Hits-to-KO, Speed, and win/loss for each side's best move against 3 known Rotom-W build(s).
Assumptions
- Switching, status moves and the opponent's counterattack are not included.
- Moves are treated as always hitting (accuracy is ignored).
- Only guaranteed criticals and guaranteed secondary effects apply (e.g. Draco Meteor's Sp. Atk drop).
- Multi-hit moves use a fixed count: 3 for 2-5 hit moves (the expected value), and the maximum for moves that roll accuracy per hit (Triple Axel, Population Bomb), since hits always land here.
- Counter, Mirror Coat and Metal Burst are excluded: they depend too much on the opponent's move type and power.
- "KO in n" is guaranteed even at the lowest roll; "n hits (p%)" is the chance at higher rolls.
- Factors that actually affected each number (weather, terrain, Intimidate, survival abilities, healing) are shown in the cells.
| Build 1 | Build 2 | Build 3 | |
|---|---|---|---|
| ↓ | 23.6〜28.0% Body Press 999HKO | 23.6〜28.0% Body Press 999HKO | 39.4〜46.5% Body Press 3 hits (84%) |
| ↓ | 58.2〜69.5% Hydro Pump 2HKO | 58.2〜69.5% Hydro Pump 2HKO | 80.2〜94.9% Hydro Pump 2HKO |
| Speed | Second S94 / S106 | Second S94 / S106 | Second S94 / S138 |
| Verdict | × Loss: n/a to KO / 2HKO to be KOed, moves second | × Loss: n/a to KO / 2HKO to be KOed, moves second | × Loss: 4HKO to KO / 2HKO to be KOed, moves second |
 ×Volcarona
Orthworm vs Volcarona Orthworm's build: Sitrus Berry, Relaxed, H32 B25 S9
Hits-to-KO, Speed, and win/loss for each side's best move against 3 known Volcarona build(s).
Assumptions
- Switching, status moves and the opponent's counterattack are not included.
- Moves are treated as always hitting (accuracy is ignored).
- Only guaranteed criticals and guaranteed secondary effects apply (e.g. Draco Meteor's Sp. Atk drop).
- Multi-hit moves use a fixed count: 3 for 2-5 hit moves (the expected value), and the maximum for moves that roll accuracy per hit (Triple Axel, Population Bomb), since hits always land here.
- Counter, Mirror Coat and Metal Burst are excluded: they depend too much on the opponent's move type and power.
- "KO in n" is guaranteed even at the lowest roll; "n hits (p%)" is the chance at higher rolls.
- Factors that actually affected each number (weather, terrain, Intimidate, survival abilities, healing) are shown in the cells.
| Build 1 | Build 2 | Build 3 | |
|---|---|---|---|
| ↓ | 39.6〜47.9% Rock Tomb 3 hits (94%) | 69.6〜84.5% Rock Tomb 2HKO | 39.6〜47.9% Rock Tomb 3HKO |
| ↓ | 105.1〜125.4% Fiery Dance 1HKO | 140.1〜166.1% Fiery Dance 1HKO | 105.1〜125.4% Fiery Dance 1HKO |
| Speed | Second S84 / S122 | Second S84 / S152 | Second S84 / S122 |
| Verdict | × Loss: 4HKO to KO / 1HKO to be KOed, moves second | × Loss: 2HKO to KO / 1HKO to be KOed, moves second | × Loss: 3HKO to KO / 1HKO to be KOed, moves second |
Orthworm's build: Leftovers, Impish, H32 B25 S9
Hits-to-KO, Speed, and win/loss for each side's best move against 3 known Volcarona build(s).
Assumptions
- Switching, status moves and the opponent's counterattack are not included.
- Moves are treated as always hitting (accuracy is ignored).
- Only guaranteed criticals and guaranteed secondary effects apply (e.g. Draco Meteor's Sp. Atk drop).
- Multi-hit moves use a fixed count: 3 for 2-5 hit moves (the expected value), and the maximum for moves that roll accuracy per hit (Triple Axel, Population Bomb), since hits always land here.
- Counter, Mirror Coat and Metal Burst are excluded: they depend too much on the opponent's move type and power.
- "KO in n" is guaranteed even at the lowest roll; "n hits (p%)" is the chance at higher rolls.
- Factors that actually affected each number (weather, terrain, Intimidate, survival abilities, healing) are shown in the cells.
| Build 1 | Build 2 | Build 3 | |
|---|---|---|---|
| ↓ | 39.6〜47.9% Rock Tomb 3 hits (94%) | 69.6〜84.5% Rock Tomb 2HKO | 39.6〜47.9% Rock Tomb 3HKO |
| ↓ | 105.1〜125.4% Fiery Dance 1HKO | 140.1〜166.1% Fiery Dance 1HKO | 105.1〜125.4% Fiery Dance 1HKO |
| Speed | Second S94 / S122 | Second S94 / S152 | Second S94 / S122 |
| Verdict | × Loss: 4HKO to KO / 1HKO to be KOed, moves second | × Loss: 2HKO to KO / 1HKO to be KOed, moves second | × Loss: 3HKO to KO / 1HKO to be KOed, moves second |
Orthworm's build: Mental Herb, Impish, H32 B25 S9
Hits-to-KO, Speed, and win/loss for each side's best move against 3 known Volcarona build(s).
Assumptions
- Switching, status moves and the opponent's counterattack are not included.
- Moves are treated as always hitting (accuracy is ignored).
- Only guaranteed criticals and guaranteed secondary effects apply (e.g. Draco Meteor's Sp. Atk drop).
- Multi-hit moves use a fixed count: 3 for 2-5 hit moves (the expected value), and the maximum for moves that roll accuracy per hit (Triple Axel, Population Bomb), since hits always land here.
- Counter, Mirror Coat and Metal Burst are excluded: they depend too much on the opponent's move type and power.
- "KO in n" is guaranteed even at the lowest roll; "n hits (p%)" is the chance at higher rolls.
- Factors that actually affected each number (weather, terrain, Intimidate, survival abilities, healing) are shown in the cells.
| Build 1 | Build 2 | Build 3 | |
|---|---|---|---|
| ↓ | 39.6〜47.9% Rock Tomb 3 hits (94%) | 69.6〜84.5% Rock Tomb 2HKO | 39.6〜47.9% Rock Tomb 3HKO |
| ↓ | 105.1〜125.4% Fiery Dance 1HKO | 140.1〜166.1% Fiery Dance 1HKO | 105.1〜125.4% Fiery Dance 1HKO |
| Speed | Second S94 / S122 | Second S94 / S152 | Second S94 / S122 |
| Verdict | × Loss: 4HKO to KO / 1HKO to be KOed, moves second | × Loss: 2HKO to KO / 1HKO to be KOed, moves second | × Loss: 3HKO to KO / 1HKO to be KOed, moves second |
 ▲イエッサン(オス)
Orthworm vs イエッサン(オス) Orthworm's build: Sitrus Berry, Relaxed, H32 B25 S9
Hits-to-KO, Speed, and win/loss for each side's best move against 3 known イエッサン(オス) build(s).
Assumptions
- Switching, status moves and the opponent's counterattack are not included.
- Moves are treated as always hitting (accuracy is ignored).
- Only guaranteed criticals and guaranteed secondary effects apply (e.g. Draco Meteor's Sp. Atk drop).
- Multi-hit moves use a fixed count: 3 for 2-5 hit moves (the expected value), and the maximum for moves that roll accuracy per hit (Triple Axel, Population Bomb), since hits always land here.
- Counter, Mirror Coat and Metal Burst are excluded: they depend too much on the opponent's move type and power.
- "KO in n" is guaranteed even at the lowest roll; "n hits (p%)" is the chance at higher rolls.
- Factors that actually affected each number (weather, terrain, Intimidate, survival abilities, healing) are shown in the cells.
| Build 1 | Build 2 | Build 3 | |
|---|---|---|---|
| ↓ | 62.0〜73.0% Body Press 2HKOcalculated with サイコフィールド | 62.0〜73.0% Body Press 2HKOcalculated with サイコフィールド | 62.0〜73.0% Body Press 2HKOcalculated with サイコフィールド |
| ↓ | 73.4〜87.0% Mystical Fire 2HKOcalculated with サイコフィールド | 67.8〜80.2% Mystical Fire 2HKOcalculated with サイコフィールド | 73.4〜87.0% Mystical Fire 2HKOcalculated with サイコフィールド |
| Speed | Second S84 / S220 | Second S84 / S161 | Second S84 / S147 |
| Verdict | ▲ Loss: 2HKO to KO / 2HKO to be KOed, moves second | ▲ Loss: 2HKO to KO / 2HKO to be KOed, moves second | ▲ Loss: 2HKO to KO / 2HKO to be KOed, moves second |
Orthworm's build: Leftovers, Impish, H32 B25 S9
Hits-to-KO, Speed, and win/loss for each side's best move against 3 known イエッサン(オス) build(s).
Assumptions
- Switching, status moves and the opponent's counterattack are not included.
- Moves are treated as always hitting (accuracy is ignored).
- Only guaranteed criticals and guaranteed secondary effects apply (e.g. Draco Meteor's Sp. Atk drop).
- Multi-hit moves use a fixed count: 3 for 2-5 hit moves (the expected value), and the maximum for moves that roll accuracy per hit (Triple Axel, Population Bomb), since hits always land here.
- Counter, Mirror Coat and Metal Burst are excluded: they depend too much on the opponent's move type and power.
- "KO in n" is guaranteed even at the lowest roll; "n hits (p%)" is the chance at higher rolls.
- Factors that actually affected each number (weather, terrain, Intimidate, survival abilities, healing) are shown in the cells.
| Build 1 | Build 2 | Build 3 | |
|---|---|---|---|
| ↓ | 62.0〜73.0% Body Press 2HKOcalculated with サイコフィールド | 62.0〜73.0% Body Press 2HKOcalculated with サイコフィールド | 62.0〜73.0% Body Press 2HKOcalculated with サイコフィールド |
| ↓ | 73.4〜87.0% Mystical Fire 2HKOcalculated with サイコフィールド | 67.8〜80.2% Mystical Fire 2HKOcalculated with サイコフィールド | 73.4〜87.0% Mystical Fire 2HKOcalculated with サイコフィールド |
| Speed | Second S94 / S220 | Second S94 / S161 | Second S94 / S147 |
| Verdict | ▲ Loss: 2HKO to KO / 2HKO to be KOed, moves second | ▲ Loss: 2HKO to KO / 2HKO to be KOed, moves second | ▲ Loss: 2HKO to KO / 2HKO to be KOed, moves second |
Orthworm's build: Mental Herb, Impish, H32 B25 S9
Hits-to-KO, Speed, and win/loss for each side's best move against 3 known イエッサン(オス) build(s).
Assumptions
- Switching, status moves and the opponent's counterattack are not included.
- Moves are treated as always hitting (accuracy is ignored).
- Only guaranteed criticals and guaranteed secondary effects apply (e.g. Draco Meteor's Sp. Atk drop).
- Multi-hit moves use a fixed count: 3 for 2-5 hit moves (the expected value), and the maximum for moves that roll accuracy per hit (Triple Axel, Population Bomb), since hits always land here.
- Counter, Mirror Coat and Metal Burst are excluded: they depend too much on the opponent's move type and power.
- "KO in n" is guaranteed even at the lowest roll; "n hits (p%)" is the chance at higher rolls.
- Factors that actually affected each number (weather, terrain, Intimidate, survival abilities, healing) are shown in the cells.
| Build 1 | Build 2 | Build 3 | |
|---|---|---|---|
| ↓ | 62.0〜73.0% Body Press 2HKOcalculated with サイコフィールド | 62.0〜73.0% Body Press 2HKOcalculated with サイコフィールド | 62.0〜73.0% Body Press 2HKOcalculated with サイコフィールド |
| ↓ | 73.4〜87.0% Mystical Fire 2HKOcalculated with サイコフィールド | 67.8〜80.2% Mystical Fire 2HKOcalculated with サイコフィールド | 73.4〜87.0% Mystical Fire 2HKOcalculated with サイコフィールド |
| Speed | Second S94 / S220 | Second S94 / S161 | Second S94 / S147 |
| Verdict | ▲ Loss: 2HKO to KO / 2HKO to be KOed, moves second | ▲ Loss: 2HKO to KO / 2HKO to be KOed, moves second | ▲ Loss: 2HKO to KO / 2HKO to be KOed, moves second |
 ×Hydreigon
Orthworm vs Hydreigon Orthworm's build: Sitrus Berry, Relaxed, H32 B25 S9
Hits-to-KO, Speed, and win/loss for each side's best move against 3 known Hydreigon build(s).
Assumptions
- Switching, status moves and the opponent's counterattack are not included.
- Moves are treated as always hitting (accuracy is ignored).
- Only guaranteed criticals and guaranteed secondary effects apply (e.g. Draco Meteor's Sp. Atk drop).
- Multi-hit moves use a fixed count: 3 for 2-5 hit moves (the expected value), and the maximum for moves that roll accuracy per hit (Triple Axel, Population Bomb), since hits always land here.
- Counter, Mirror Coat and Metal Burst are excluded: they depend too much on the opponent's move type and power.
- "KO in n" is guaranteed even at the lowest roll; "n hits (p%)" is the chance at higher rolls.
- Factors that actually affected each number (weather, terrain, Intimidate, survival abilities, healing) are shown in the cells.
| Build 1 | Build 2 | Build 3 | |
|---|---|---|---|
| ↓ | 67.5〜80.5% Body Press 2HKO | 67.5〜80.5% Body Press 2HKO | 67.5〜80.5% Body Press 2HKO |
| ↓ | 120.9〜143.5% Fire Blast 1HKO | 110.7〜131.1% Fire Blast 1HKO | 128.8〜152.5% Flamethrower 1HKO |
| Speed | Second S84 / S225 | Second S84 / S165 | Second S84 / S150 |
| Verdict | × Loss: 2HKO to KO / 1HKO to be KOed, moves second | × Loss: 2HKO to KO / 1HKO to be KOed, moves second | × Loss: 2HKO to KO / 1HKO to be KOed, moves second |
Orthworm's build: Leftovers, Impish, H32 B25 S9
Hits-to-KO, Speed, and win/loss for each side's best move against 3 known Hydreigon build(s).
Assumptions
- Switching, status moves and the opponent's counterattack are not included.
- Moves are treated as always hitting (accuracy is ignored).
- Only guaranteed criticals and guaranteed secondary effects apply (e.g. Draco Meteor's Sp. Atk drop).
- Multi-hit moves use a fixed count: 3 for 2-5 hit moves (the expected value), and the maximum for moves that roll accuracy per hit (Triple Axel, Population Bomb), since hits always land here.
- Counter, Mirror Coat and Metal Burst are excluded: they depend too much on the opponent's move type and power.
- "KO in n" is guaranteed even at the lowest roll; "n hits (p%)" is the chance at higher rolls.
- Factors that actually affected each number (weather, terrain, Intimidate, survival abilities, healing) are shown in the cells.
| Build 1 | Build 2 | Build 3 | |
|---|---|---|---|
| ↓ | 67.5〜80.5% Body Press 2HKO | 67.5〜80.5% Body Press 2HKO | 67.5〜80.5% Body Press 2HKO |
| ↓ | 120.9〜143.5% Fire Blast 1HKO | 110.7〜131.1% Fire Blast 1HKO | 128.8〜152.5% Flamethrower 1HKO |
| Speed | Second S94 / S225 | Second S94 / S165 | Second S94 / S150 |
| Verdict | × Loss: 2HKO to KO / 1HKO to be KOed, moves second | × Loss: 2HKO to KO / 1HKO to be KOed, moves second | × Loss: 2HKO to KO / 1HKO to be KOed, moves second |
Orthworm's build: Mental Herb, Impish, H32 B25 S9
Hits-to-KO, Speed, and win/loss for each side's best move against 3 known Hydreigon build(s).
Assumptions
- Switching, status moves and the opponent's counterattack are not included.
- Moves are treated as always hitting (accuracy is ignored).
- Only guaranteed criticals and guaranteed secondary effects apply (e.g. Draco Meteor's Sp. Atk drop).
- Multi-hit moves use a fixed count: 3 for 2-5 hit moves (the expected value), and the maximum for moves that roll accuracy per hit (Triple Axel, Population Bomb), since hits always land here.
- Counter, Mirror Coat and Metal Burst are excluded: they depend too much on the opponent's move type and power.
- "KO in n" is guaranteed even at the lowest roll; "n hits (p%)" is the chance at higher rolls.
- Factors that actually affected each number (weather, terrain, Intimidate, survival abilities, healing) are shown in the cells.
| Build 1 | Build 2 | Build 3 | |
|---|---|---|---|
| ↓ | 67.5〜80.5% Body Press 2HKO | 67.5〜80.5% Body Press 2HKO | 67.5〜80.5% Body Press 2HKO |
| ↓ | 120.9〜143.5% Fire Blast 1HKO | 110.7〜131.1% Fire Blast 1HKO | 128.8〜152.5% Flamethrower 1HKO |
| Speed | Second S94 / S225 | Second S94 / S165 | Second S94 / S150 |
| Verdict | × Loss: 2HKO to KO / 1HKO to be KOed, moves second | × Loss: 2HKO to KO / 1HKO to be KOed, moves second | × Loss: 2HKO to KO / 1HKO to be KOed, moves second |
 ×Skeledirge
Orthworm vs Skeledirge Orthworm's build: Sitrus Berry, Relaxed, H32 B25 S9
Hits-to-KO, Speed, and win/loss for each side's best move against 3 known Skeledirge build(s).
Assumptions
- Switching, status moves and the opponent's counterattack are not included.
- Moves are treated as always hitting (accuracy is ignored).
- Only guaranteed criticals and guaranteed secondary effects apply (e.g. Draco Meteor's Sp. Atk drop).
- Multi-hit moves use a fixed count: 3 for 2-5 hit moves (the expected value), and the maximum for moves that roll accuracy per hit (Triple Axel, Population Bomb), since hits always land here.
- Counter, Mirror Coat and Metal Burst are excluded: they depend too much on the opponent's move type and power.
- "KO in n" is guaranteed even at the lowest roll; "n hits (p%)" is the chance at higher rolls.
- Factors that actually affected each number (weather, terrain, Intimidate, survival abilities, healing) are shown in the cells.
| Build 1 | Build 2 | Build 3 | |
|---|---|---|---|
| ↓ | 22.7〜27.5% Earthquake 999HKO | 22.7〜27.5% Earthquake 999HKO | 11.4〜13.7% Earthquake 5HKO |
| ↓ | 89.3〜106.2% Torch Song 1 hits (31%) | 89.3〜106.2% Torch Song 1 hits (31%) | 89.3〜106.2% Torch Song 1 hits (31%) |
| Speed | Second S84 / S86 | Second S84 / S86 | Second S84 / S86 |
| Verdict | × Loss: n/a to KO / 2HKO to be KOed, moves second | × Loss: n/a to KO / 2HKO to be KOed, moves second | × Loss: 5HKO to KO / 2HKO to be KOed, moves second |
Orthworm's build: Leftovers, Impish, H32 B25 S9
Hits-to-KO, Speed, and win/loss for each side's best move against 3 known Skeledirge build(s).
Assumptions
- Switching, status moves and the opponent's counterattack are not included.
- Moves are treated as always hitting (accuracy is ignored).
- Only guaranteed criticals and guaranteed secondary effects apply (e.g. Draco Meteor's Sp. Atk drop).
- Multi-hit moves use a fixed count: 3 for 2-5 hit moves (the expected value), and the maximum for moves that roll accuracy per hit (Triple Axel, Population Bomb), since hits always land here.
- Counter, Mirror Coat and Metal Burst are excluded: they depend too much on the opponent's move type and power.
- "KO in n" is guaranteed even at the lowest roll; "n hits (p%)" is the chance at higher rolls.
- Factors that actually affected each number (weather, terrain, Intimidate, survival abilities, healing) are shown in the cells.
| Build 1 | Build 2 | Build 3 | |
|---|---|---|---|
| ↓ | 22.7〜27.5% Earthquake 999HKO | 22.7〜27.5% Earthquake 999HKO | 11.4〜13.7% Earthquake 5HKO |
| ↓ | 89.3〜106.2% Torch Song 1 hits (31%) | 89.3〜106.2% Torch Song 1 hits (31%) | 89.3〜106.2% Torch Song 1 hits (31%) |
| Speed | First S94 / S86 | First S94 / S86 | First S94 / S86 |
| Verdict | × Loss: n/a to KO / 2HKO to be KOed, moves first | × Loss: n/a to KO / 2HKO to be KOed, moves first | × Loss: 5HKO to KO / 2HKO to be KOed, moves first |
Orthworm's build: Mental Herb, Impish, H32 B25 S9
Hits-to-KO, Speed, and win/loss for each side's best move against 3 known Skeledirge build(s).
Assumptions
- Switching, status moves and the opponent's counterattack are not included.
- Moves are treated as always hitting (accuracy is ignored).
- Only guaranteed criticals and guaranteed secondary effects apply (e.g. Draco Meteor's Sp. Atk drop).
- Multi-hit moves use a fixed count: 3 for 2-5 hit moves (the expected value), and the maximum for moves that roll accuracy per hit (Triple Axel, Population Bomb), since hits always land here.
- Counter, Mirror Coat and Metal Burst are excluded: they depend too much on the opponent's move type and power.
- "KO in n" is guaranteed even at the lowest roll; "n hits (p%)" is the chance at higher rolls.
- Factors that actually affected each number (weather, terrain, Intimidate, survival abilities, healing) are shown in the cells.
| Build 1 | Build 2 | Build 3 | |
|---|---|---|---|
| ↓ | 22.7〜27.5% Earthquake 999HKO | 22.7〜27.5% Earthquake 999HKO | 11.4〜13.7% Earthquake 5HKO |
| ↓ | 89.3〜106.2% Torch Song 1 hits (31%) | 89.3〜106.2% Torch Song 1 hits (31%) | 89.3〜106.2% Torch Song 1 hits (31%) |
| Speed | First S94 / S86 | First S94 / S86 | First S94 / S86 |
| Verdict | × Loss: n/a to KO / 2HKO to be KOed, moves first | × Loss: n/a to KO / 2HKO to be KOed, moves first | × Loss: 5HKO to KO / 2HKO to be KOed, moves first |
 ▲*Metagross
Orthworm vs Metagross Orthworm's build: Sitrus Berry, Relaxed, H32 B25 S9
Hits-to-KO, Speed, and win/loss for each side's best move against 1 known Metagross build(s).
Assumptions
- Switching, status moves and the opponent's counterattack are not included.
- Moves are treated as always hitting (accuracy is ignored).
- Only guaranteed criticals and guaranteed secondary effects apply (e.g. Draco Meteor's Sp. Atk drop).
- Multi-hit moves use a fixed count: 3 for 2-5 hit moves (the expected value), and the maximum for moves that roll accuracy per hit (Triple Axel, Population Bomb), since hits always land here.
- Counter, Mirror Coat and Metal Burst are excluded: they depend too much on the opponent's move type and power.
- "KO in n" is guaranteed even at the lowest roll; "n hits (p%)" is the chance at higher rolls.
- Factors that actually affected each number (weather, terrain, Intimidate, survival abilities, healing) are shown in the cells.
| Build 1 | |
|---|---|
| ↓ | 30.6〜36.9% Earthquake 3 hits (56%) |
| ↓ | 57.1〜68.9% Hammer Arm 2 hits (59%) |
| Speed | Second S84 / S162 |
| Verdict | ▲ Loss: 4HKO to KO / 3HKO to be KOed, moves second |
Orthworm's build: Leftovers, Impish, H32 B25 S9
Hits-to-KO, Speed, and win/loss for each side's best move against 1 known Metagross build(s).
Assumptions
- Switching, status moves and the opponent's counterattack are not included.
- Moves are treated as always hitting (accuracy is ignored).
- Only guaranteed criticals and guaranteed secondary effects apply (e.g. Draco Meteor's Sp. Atk drop).
- Multi-hit moves use a fixed count: 3 for 2-5 hit moves (the expected value), and the maximum for moves that roll accuracy per hit (Triple Axel, Population Bomb), since hits always land here.
- Counter, Mirror Coat and Metal Burst are excluded: they depend too much on the opponent's move type and power.
- "KO in n" is guaranteed even at the lowest roll; "n hits (p%)" is the chance at higher rolls.
- Factors that actually affected each number (weather, terrain, Intimidate, survival abilities, healing) are shown in the cells.
| Build 1 | |
|---|---|
| ↓ | 30.6〜36.9% Earthquake 3 hits (56%) |
| ↓ | 57.1〜68.9% Hammer Arm 2HKO |
| Speed | Second S94 / S162 |
| Verdict | × Loss: 4HKO to KO / 2HKO to be KOed, moves second |
Orthworm's build: Mental Herb, Impish, H32 B25 S9
Hits-to-KO, Speed, and win/loss for each side's best move against 1 known Metagross build(s).
Assumptions
- Switching, status moves and the opponent's counterattack are not included.
- Moves are treated as always hitting (accuracy is ignored).
- Only guaranteed criticals and guaranteed secondary effects apply (e.g. Draco Meteor's Sp. Atk drop).
- Multi-hit moves use a fixed count: 3 for 2-5 hit moves (the expected value), and the maximum for moves that roll accuracy per hit (Triple Axel, Population Bomb), since hits always land here.
- Counter, Mirror Coat and Metal Burst are excluded: they depend too much on the opponent's move type and power.
- "KO in n" is guaranteed even at the lowest roll; "n hits (p%)" is the chance at higher rolls.
- Factors that actually affected each number (weather, terrain, Intimidate, survival abilities, healing) are shown in the cells.
| Build 1 | |
|---|---|
| ↓ | 30.6〜36.9% Earthquake 3 hits (56%) |
| ↓ | 57.1〜68.9% Hammer Arm 2HKO |
| Speed | Second S94 / S162 |
| Verdict | × Loss: 4HKO to KO / 2HKO to be KOed, moves second |
 ×Dragonite
Orthworm vs Dragonite Orthworm's build: Sitrus Berry, Relaxed, H32 B25 S9
Hits-to-KO, Speed, and win/loss for each side's best move against 3 known Dragonite build(s).
Assumptions
- Switching, status moves and the opponent's counterattack are not included.
- Moves are treated as always hitting (accuracy is ignored).
- Only guaranteed criticals and guaranteed secondary effects apply (e.g. Draco Meteor's Sp. Atk drop).
- Multi-hit moves use a fixed count: 3 for 2-5 hit moves (the expected value), and the maximum for moves that roll accuracy per hit (Triple Axel, Population Bomb), since hits always land here.
- Counter, Mirror Coat and Metal Burst are excluded: they depend too much on the opponent's move type and power.
- "KO in n" is guaranteed even at the lowest roll; "n hits (p%)" is the chance at higher rolls.
- Factors that actually affected each number (weather, terrain, Intimidate, survival abilities, healing) are shown in the cells.
| Build 1 | Build 2 | Build 3 | |
|---|---|---|---|
| ↓ | 10.8〜13.2% Rock Tomb 999HKO | 12.6〜15.0% Rock Tomb 4 hits (5%) | 12.6〜15.0% Rock Tomb 4 hits (5%) |
| ↓ | 110.7〜131.1% Flamethrower 1HKO | 78.0〜92.7% Flamethrower 2HKO | 85.9〜101.7% Flamethrower 1 hits (13%) |
| Speed | Second S84 / S152 | Second S84 / S145 | Second S84 / S132 |
| Verdict | × Loss: n/a to KO / 1HKO to be KOed, moves second | × Loss: 5HKO to KO / 2HKO to be KOed, moves second | × Loss: 5HKO to KO / 2HKO to be KOed, moves second |
Orthworm's build: Leftovers, Impish, H32 B25 S9
Hits-to-KO, Speed, and win/loss for each side's best move against 3 known Dragonite build(s).
Assumptions
- Switching, status moves and the opponent's counterattack are not included.
- Moves are treated as always hitting (accuracy is ignored).
- Only guaranteed criticals and guaranteed secondary effects apply (e.g. Draco Meteor's Sp. Atk drop).
- Multi-hit moves use a fixed count: 3 for 2-5 hit moves (the expected value), and the maximum for moves that roll accuracy per hit (Triple Axel, Population Bomb), since hits always land here.
- Counter, Mirror Coat and Metal Burst are excluded: they depend too much on the opponent's move type and power.
- "KO in n" is guaranteed even at the lowest roll; "n hits (p%)" is the chance at higher rolls.
- Factors that actually affected each number (weather, terrain, Intimidate, survival abilities, healing) are shown in the cells.
| Build 1 | Build 2 | Build 3 | |
|---|---|---|---|
| ↓ | 10.8〜13.2% Rock Tomb 999HKO | 12.6〜15.0% Rock Tomb 4 hits (5%) | 12.6〜15.0% Rock Tomb 4 hits (5%) |
| ↓ | 110.7〜131.1% Flamethrower 1HKO | 78.0〜92.7% Flamethrower 2HKO | 85.9〜101.7% Flamethrower 1 hits (13%) |
| Speed | Second S94 / S152 | Second S94 / S145 | Second S94 / S132 |
| Verdict | × Loss: n/a to KO / 1HKO to be KOed, moves second | × Loss: 5HKO to KO / 2HKO to be KOed, moves second | × Loss: 5HKO to KO / 2HKO to be KOed, moves second |
Orthworm's build: Mental Herb, Impish, H32 B25 S9
Hits-to-KO, Speed, and win/loss for each side's best move against 3 known Dragonite build(s).
Assumptions
- Switching, status moves and the opponent's counterattack are not included.
- Moves are treated as always hitting (accuracy is ignored).
- Only guaranteed criticals and guaranteed secondary effects apply (e.g. Draco Meteor's Sp. Atk drop).
- Multi-hit moves use a fixed count: 3 for 2-5 hit moves (the expected value), and the maximum for moves that roll accuracy per hit (Triple Axel, Population Bomb), since hits always land here.
- Counter, Mirror Coat and Metal Burst are excluded: they depend too much on the opponent's move type and power.
- "KO in n" is guaranteed even at the lowest roll; "n hits (p%)" is the chance at higher rolls.
- Factors that actually affected each number (weather, terrain, Intimidate, survival abilities, healing) are shown in the cells.
| Build 1 | Build 2 | Build 3 | |
|---|---|---|---|
| ↓ | 10.8〜13.2% Rock Tomb 999HKO | 12.6〜15.0% Rock Tomb 4 hits (5%) | 12.6〜15.0% Rock Tomb 4 hits (5%) |
| ↓ | 110.7〜131.1% Flamethrower 1HKO | 78.0〜92.7% Flamethrower 2HKO | 85.9〜101.7% Flamethrower 1 hits (13%) |
| Speed | Second S94 / S152 | Second S94 / S145 | Second S94 / S132 |
| Verdict | × Loss: n/a to KO / 1HKO to be KOed, moves second | × Loss: 5HKO to KO / 2HKO to be KOed, moves second | × Loss: 5HKO to KO / 2HKO to be KOed, moves second |
Estimated from precomputed 1v1s against the top 30 Pokémon. Both sides pick their best-hitting move from a pool of their 10 most-used moves (switching and status moves not considered). * = the verdict depends on which build (item/nature/EVs) either side runs.
Judge with your own party → Party BuilderTeam Examples
Sitrus BerryBody PressHeavy SlamStealth RockShed TailSitrus BerryBody PressStealth RockIron DefenseShed Tail